The Wolf Cut for Men: How to Get the Shaggy, Layered Look
Half shag, half mullet, all attitude. The wolf cut is controlled chaos.
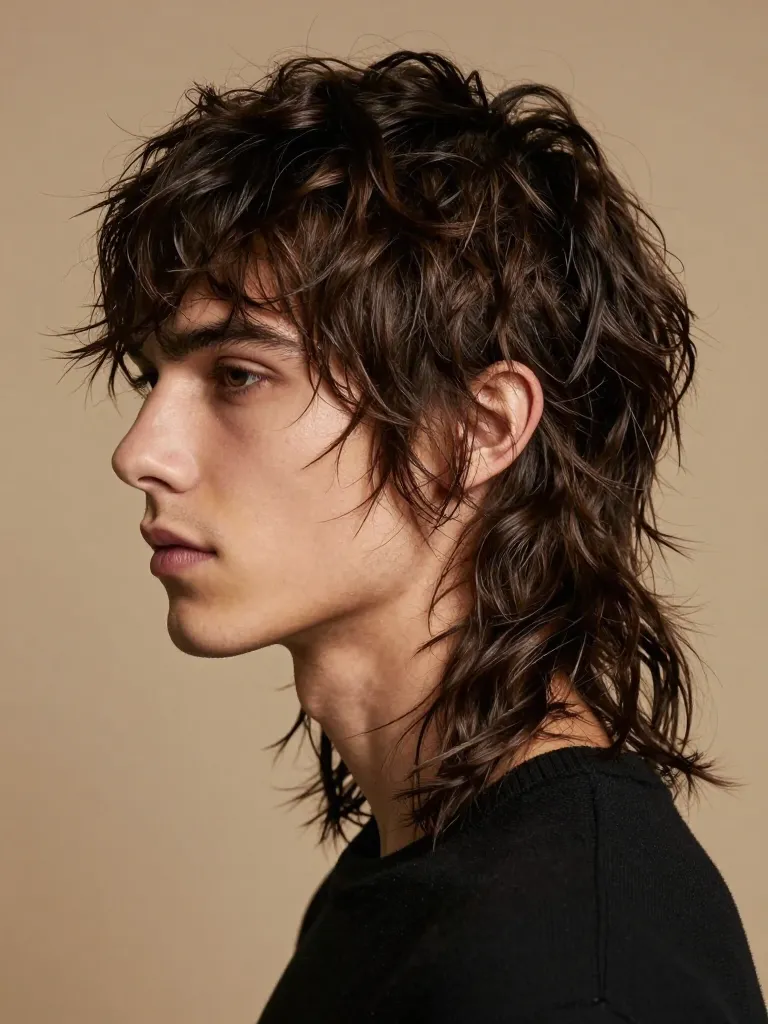
The wolf cut is what happens when a shag and a mullet have a baby and that baby listens to too much indie rock. It’s heavily layered, deliberately messy, and looks best when it looks like you didn’t try. The top is short and voluminous with choppy, disconnected layers. The sides are wispy and face-framing. The back is longer — not a full mullet tail, but enough to create that signature silhouette. The wolf cut exploded on TikTok, but it’s been a staple in Korean men’s hair for years. The difference between a good wolf cut and a bad one? Layer placement. Get it right and you look like a rockstar. Get it wrong and you look like you lost a fight with a lawnmower.
Step 1: Section the Hair into Wolf Cut Zones
- Rat-tail comb
- Sectioning clips
- Mirror
The wolf cut lives and dies by its layering zones. Unlike a standard mullet (which is short-front-long-back), the wolf cut is short-top-long-sides-and-back with heavy internal texture throughout. Section your hair into four horizontal zones: crown (top 2 inches), mid-back (middle section), lower-back (below the ears), and nape (bottom section). Clip each zone up. The crown gets the shortest layers (2-3 inches). The mid-back gets medium layers (4-5 inches). The lower-back gets long layers (6-7 inches). The nape is left at full length. This zone system is what creates the wolf cut’s signature cascading, shaggy silhouette.
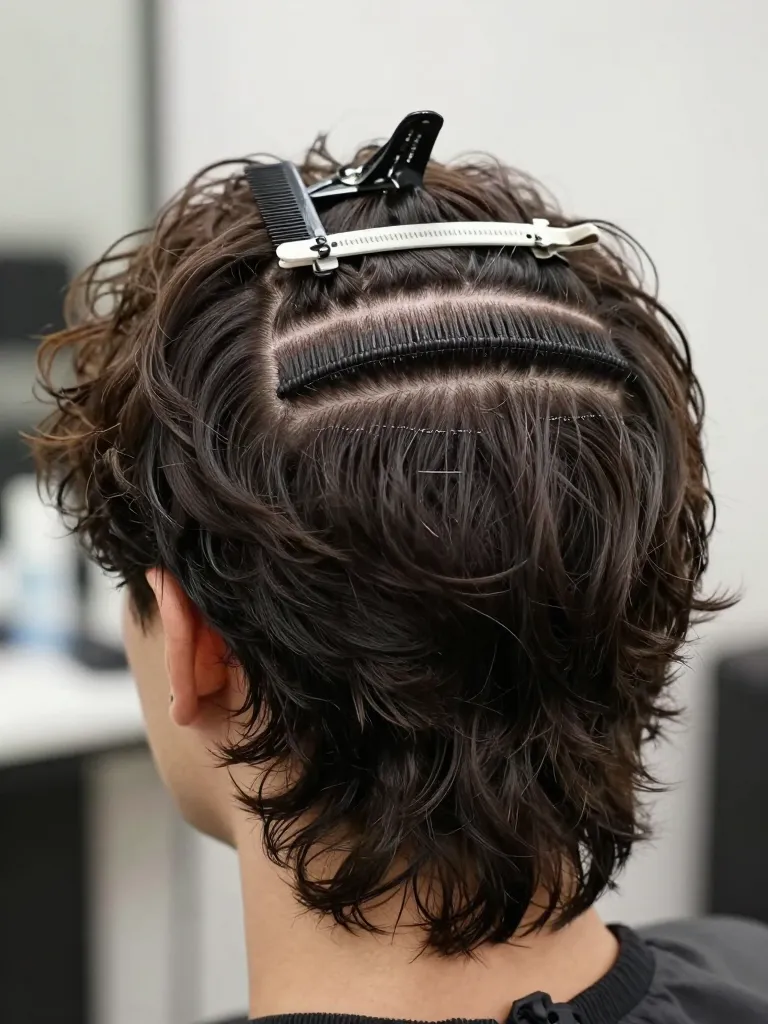
Step 2: Cut the Crown for Maximum Volume
- Sharp shears
- Comb
- Mirror
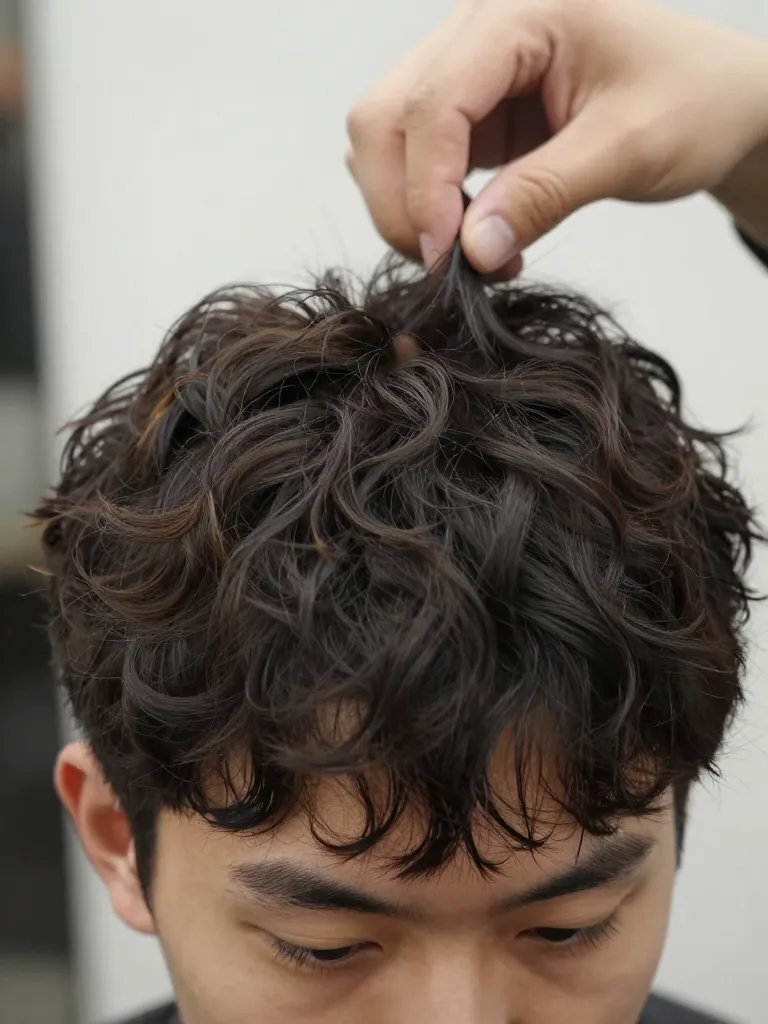
The crown is where the wolf cut earns its name — this is the ‘wild mane’ zone. Release the crown section. Take vertical sections and hold them straight up. Point-cut aggressively at steep angles, creating deliberately uneven, choppy layers. The target length is 2-3 inches when the hair is pulled straight up — which means it’ll sit about 1.5-2 inches when it falls. The key is DISCONNECTION: the crown layers should NOT blend smoothly into the mid-back. There should be a visible step — a gap in length — between the crown and the zone below. This disconnection is what separates a wolf cut from a regular layered cut. Without it, you just have a shag.
Step 3: Build the Cascading Side Layers
- Sharp shears
- Razor comb
- Sectioning clips
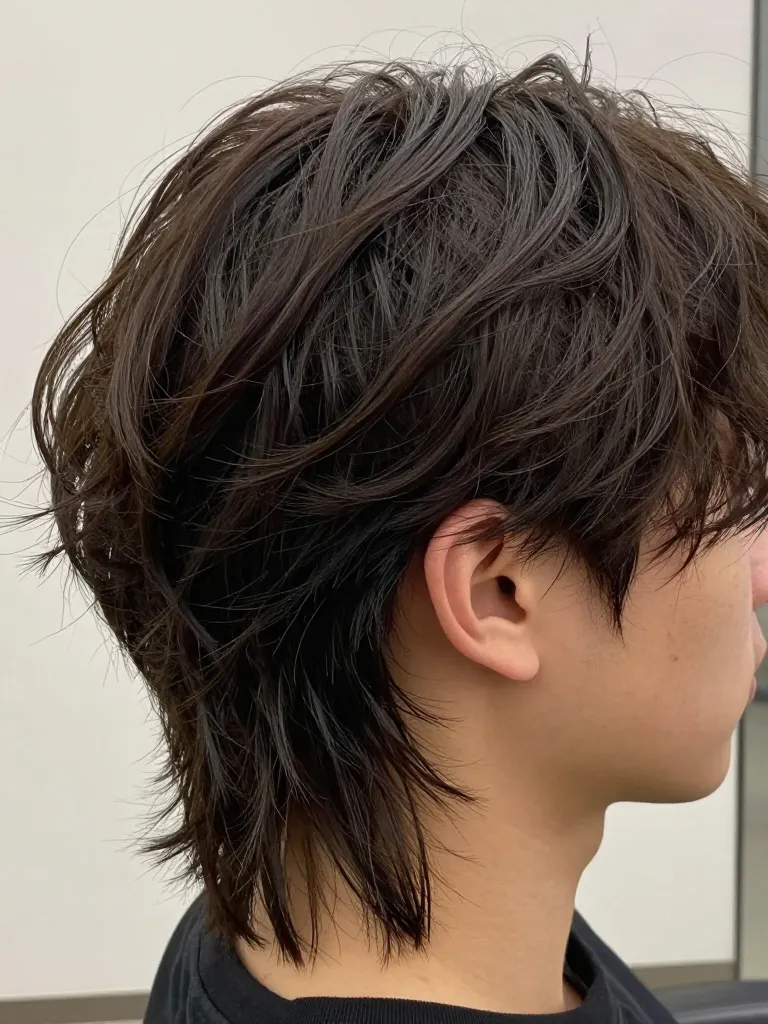
The mid-back and lower-back zones create the wolf cut’s cascading curtain effect. Release the mid-back zone. Cut it to 4-5 inches, using the same aggressive point-cutting technique. Then release the lower-back zone and cut it to 6-7 inches. Each zone should have a visible length step from the one above — this creates the cascading, waterfall-like layering that defines the wolf cut. For the sides, angle the layers shorter near the face (2-3 inches at the temple) and longer toward the back. These face-framing layers are critical — they’re what make the wolf cut look intentional rather than accidental. Texturize the sideburn area with a razor comb for wispy, face-framing pieces.
Step 4: Texturize for the ‘I Didn’t Try’ Look
- Razor comb
- Regular shears for refinement
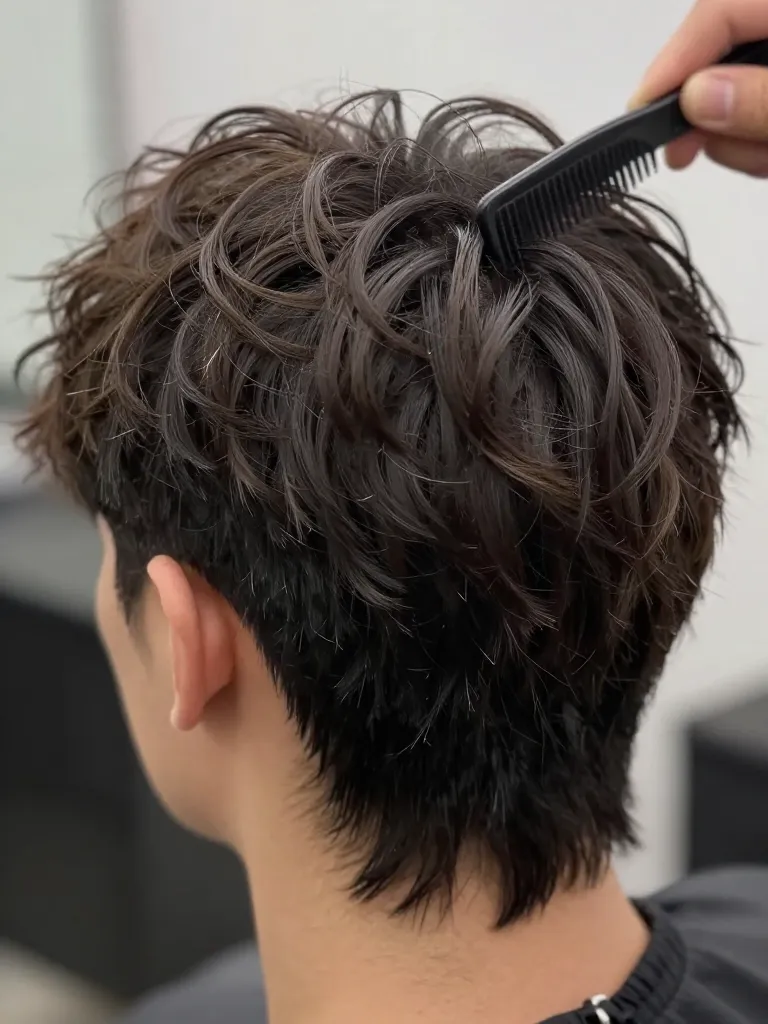
The wolf cut needs heavy texturing to live. Without it, the layers look like a regular layered cut with an identity crisis. Using a razor comb, work through the mid-lengths and ends of every zone — not the roots. Focus on creating piece-y separation and removing bulk from the interior. The goal is that ‘I woke up like this’ texture: when you run your fingers through the hair, individual sections should separate and fall into place on their own. For wavy hair, this step is lighter (waves already have texture). For straight hair, be more aggressive — straight-haired wolf cuts need extra texturing to avoid looking like a helmet.
Step 5: Style for Effortless Chaos
- Sea salt spray or texturizing mousse
- Blow dryer (optional)
The wolf cut styles itself — almost. Start with damp hair. Apply a sea salt spray or texturizing mousse from roots to ends. Scrunch the hair upward with your hands, encouraging the natural wave and creating volume at the crown. Let it air-dry, or blow-dry on low heat while scrunching. Don’t use a brush — brushes smooth out the texture you just built. Once dry, shake your head and tousle with your fingers. The final look should be deliberately messy: choppy volume on top, wispy face-framing on the sides, cascading layers in the back. If any section looks too ‘done,’ mess it up with your fingers. The wolf cut should never look polished.
Why This Works
The wolf cut works because it exploits the natural properties of layered hair. The disconnected crown layers create volume through shorter hair standing away from the scalp. The cascading mid and lower layers create movement through graduated weight — heavier at the bottom, lighter at the top. The face-framing side layers draw the eye inward, creating the illusion of a more angular face structure. The texturing removes just enough weight to let the layers move independently without looking thin. The result is a cut that looks messy but is actually precisely engineered — every layer is placed to create a specific visual effect. The ‘I didn’t try’ aesthetic requires more planning than most ‘polished’ cuts.
Safety Warnings:
- Don’t use thinning shears on the wolf cut — they create frizz and destroy the piece-y texture
- Cut less than you think — the wolf cut’s heavy layering removes more length than expected
- Never razor straight hair aggressively — it causes split ends and frizz on non-textured hair
Pro Tips
Related Guides
- Men’s Mullet Variations — the full overview
- Straight hair mullet guide — for straight-haired guys
- Curly mullet guide — for curly-haired guys
The wolf cut is the haircut for men who want to look like they just walked off a festival stage — even if the most exciting thing they did today was make coffee. It’s half shag, half mullet, and entirely about attitude. The heavy layering, the disconnected crown, the cascading sides — it’s engineered chaos. And the best part? The less you try to style it, the better it looks. That’s not laziness. That’s design.
Let it grow. Let it shag. Let it howl. 🐺✂️
