How to Cut a Skin Fade Haircut for Men: The Complete Barber-Grade Guide
The fade that makes people look twice. Here’s how to build it from zero.
The skin fade is the most requested haircut in barbershops worldwide — and the most botched DIY attempt on the internet. The problem isn’t the concept (short sides, longer top — got it). The problem is the gradient. A skin fade isn’t a single length on the sides. It’s a seamless transition from bare skin to full length, and within that 1-2 inch transition zone, the hair increases in micro-increments that create an optical illusion of smoothness. Miss one guard length, skip one blend step, or rush the debulk line, and you get a visible band that screams ‘I did this in my bathroom.’ This guide covers the full skin fade — from zero to finished — with the precision that makes barbers charge $60 for this cut.
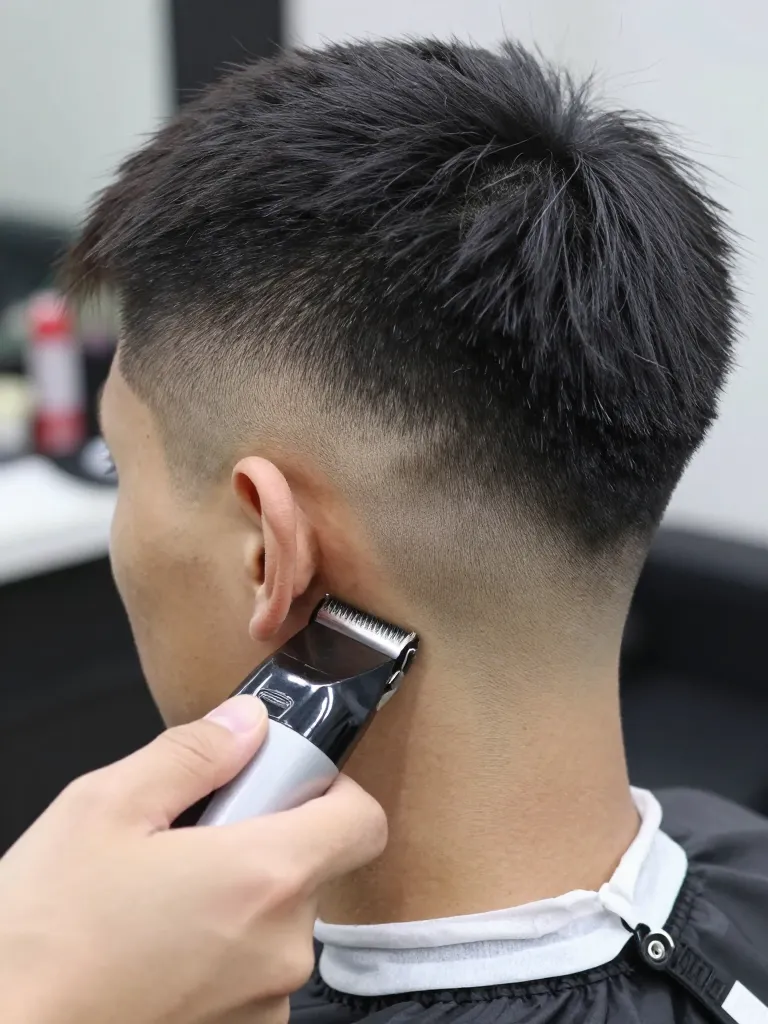
Step 1: Establish the Fade Zone with a Zero Guard
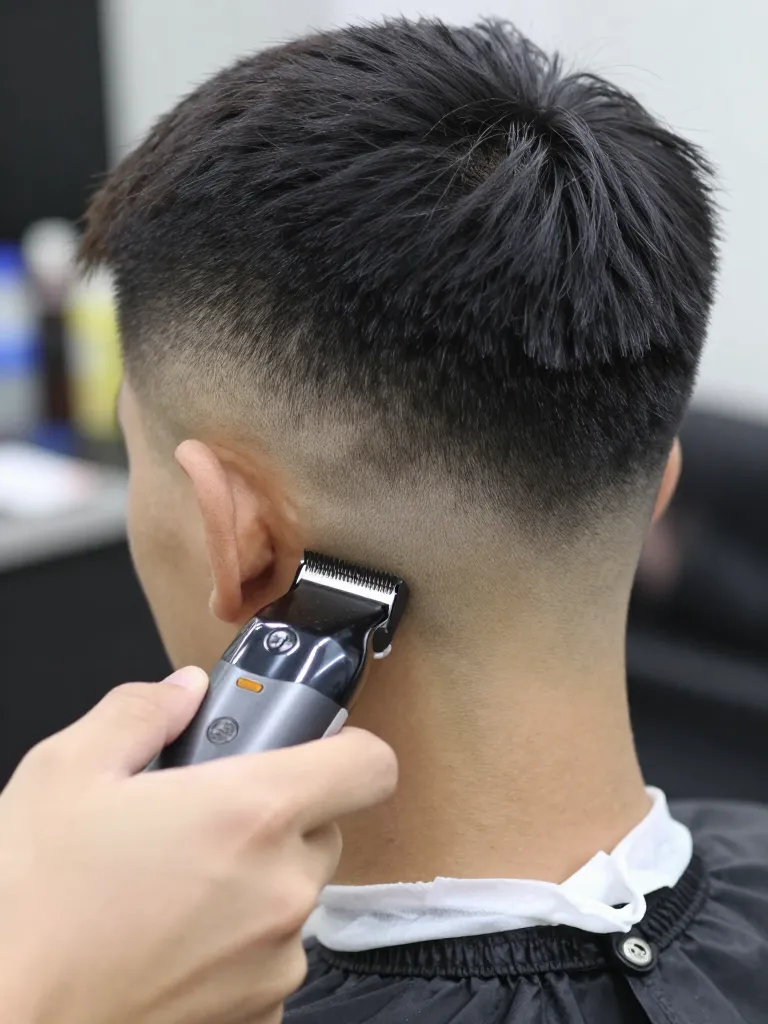
The skin fade starts at the bottom — literally. Using a foil shaver (not clippers — the shaver gets closer to skin), start at the nape and work upward to approximately 1 inch above the ear. This is your ‘skin zone’ — the area that will be completely bare. The key is getting a clean, even skin line at the base. Any unevenness here will be visible in the finished fade because the skin catches light differently than hair. Work in slow, overlapping passes. Don’t press hard — let the shaver do the work. The skin zone should extend from the nape up to just above the ear, following the natural curvature of the head. Above this line is where the gradient begins.
Step 2: Build the Gradient with Progressive Guard Lengths
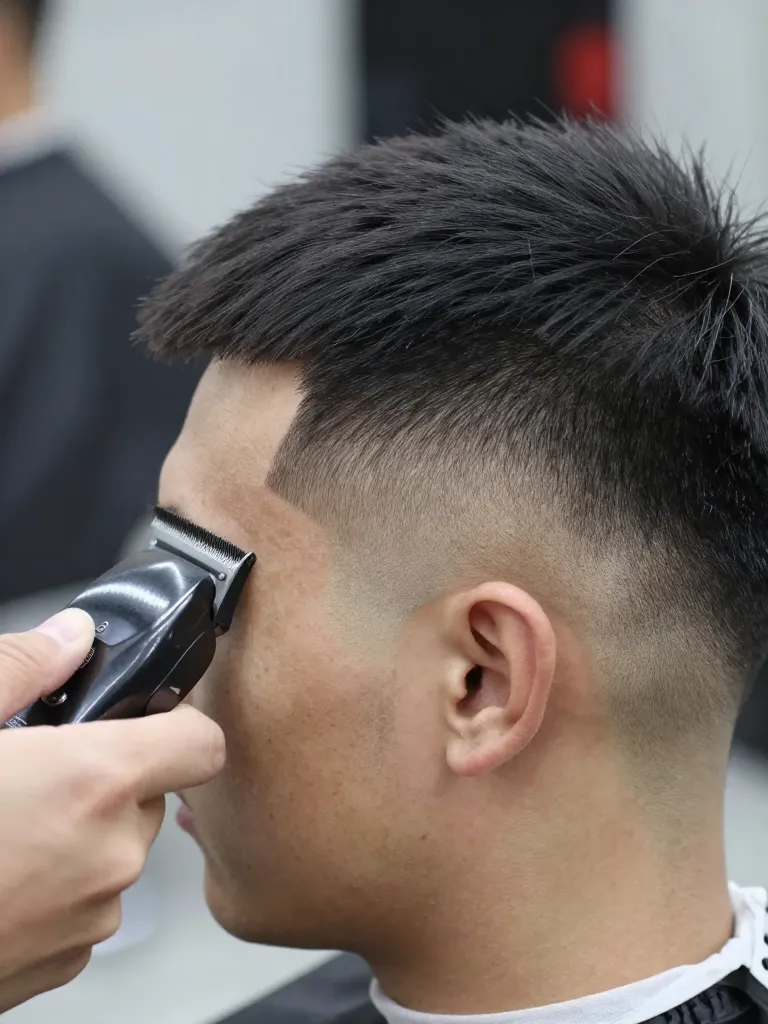
The gradient is where the art lives. Starting just above the skin zone, use clippers with a #0.5 guard (or no guard, lever closed) and flick upward — don’t go straight up, use a scooping motion that tapers the hair at the top of each pass. Then switch to #1 guard, working the next half-inch above. Then #1.5, then #2. Each guard length overlaps the one below by about a quarter-inch — this overlap is what creates the seamless gradient. The critical technique is the ‘flick’ or ‘scoop’ — instead of running the clippers straight up and stopping, you curve the clipper away from the head at the top of each stroke. This creates a soft, diffused edge rather than a hard line. The entire gradient zone should be 1.5-2 inches wide. Above the #2 guard, you transition into the ‘debulk’ zone where the hair is long enough to blend with scissors.
Step 3: Debulk the Top and Remove Weight
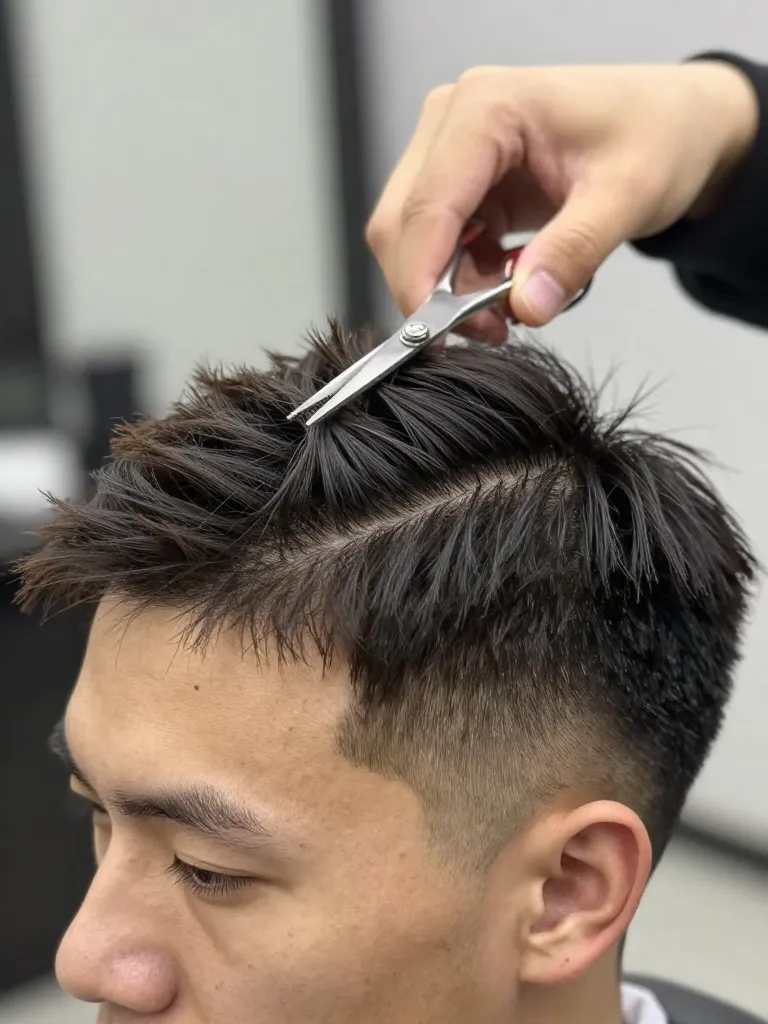
The top of a skin fade needs debulking — especially if you have thick hair. Without debulking, the top looks like a helmet sitting on top of a faded base. The contrast is too stark. Using thinning shears (or regular shears with a point-cutting technique), take horizontal sections through the top and remove weight from the mid-lengths and ends. Don’t cut length — just remove bulk. Focus on the crown area, where hair is naturally thickest. The goal is enough weight removal that the top looks textured and movable, not heavy and blocky. For straight hair, this step is critical — straight hair sits flat and thick without internal weight removal. For wavy or curly hair, you can be less aggressive — natural texture does some of the work for you.
Step 4: Shape the Top with Point Cutting
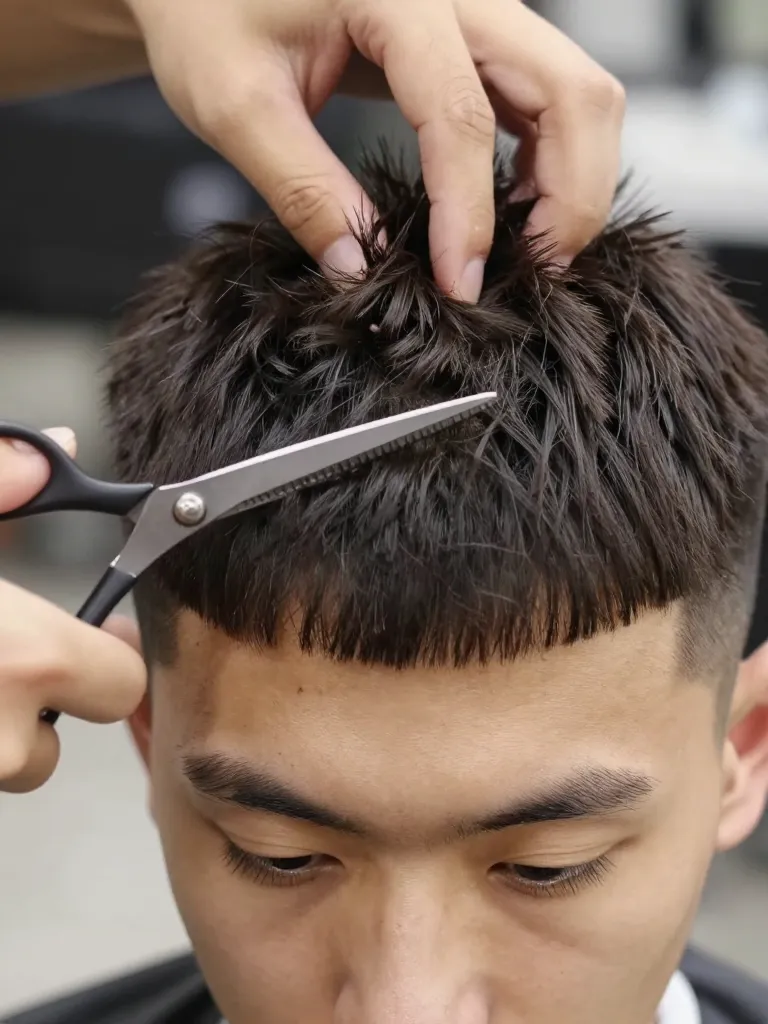
The top needs shape — and that means point cutting. Release the top section and determine your target length: 2-3 inches for a textured crop, 3-4 inches for a quiff or pompadour. Using shears, point-cut into the ends at steep angles (45-60 degrees). This creates the choppy, piece-y texture that separates a styled fade from a buzz-cut-with-long-top. The fringe should be slightly shorter in the center and longer at the temples — this creates a natural frame when styled forward. Work from the fringe back to the crown, gradually increasing length so the top blends seamlessly into the fade zone. The transition from top to fade should be invisible — no hard lines, no visible ‘steps.’
Step 5: Detail the Edges and Clean Up
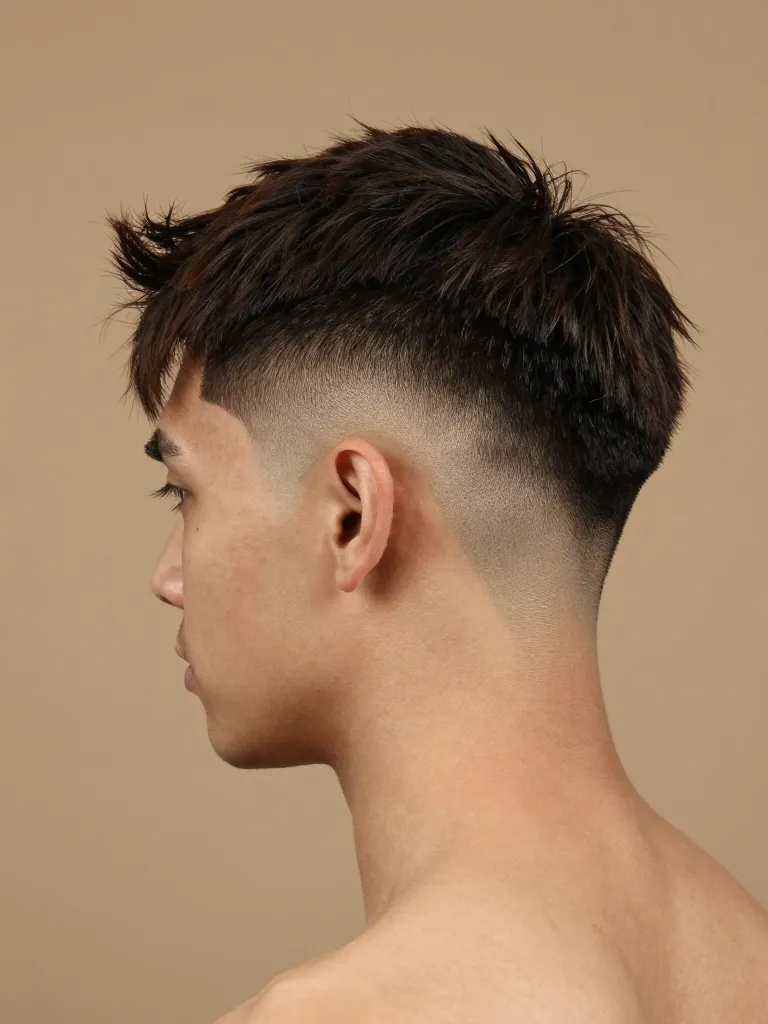
The details are what separate a good fade from a great fade. Using a trimmer (not clippers), clean up the sideburns — they should be sharp, straight, and symmetrical. The neckline should be tapered or squared (your choice), with a clean, defined edge. Around the ears, use the trimmer to create a clean arc that follows the natural ear shape. Finally, use a razor (or trimmer with a T-blade) to define the hairline at the temples and nape. These details take 5 minutes but they’re what make the fade look finished rather than ‘almost done.’ Step back, check both sides with a mirror, and touch up any visible lines or uneven spots.
⚠️ Safety Warnings
- Never use a foil shaver on irritated or broken skin — it will cause cuts and infection
- Clean your clippers and shaver with disinfectant before every use — barber hygiene prevents skin infections
- If you nick yourself, apply styptic powder immediately — don’t continue cutting over a wound
Why This Works
The skin fade works because of optical physics. The human eye perceives gradual transitions as smooth — even when the underlying structure is discrete steps. By increasing hair length in quarter-inch increments across a 2-inch zone, the fade creates an optical illusion of a seamless gradient. The bare skin at the base maximizes contrast, which makes the gradient more visible and more impressive. The technique — flicking the clippers at the top of each pass — creates a diffused edge rather than a hard line, which is what allows each guard length to blend into the next. It’s engineering disguised as a haircut.
Pro Tips
Related Guides
Fade Haircut for Men — Overview of all fade variations
Mid fade styling guide — The balanced fade for every environment
Taper fade maintenance — The low-maintenance fade option
The skin fade is the haircut that proves barbershop work is engineering. The gradient — from bare skin to full length — is an optical illusion built through mathematical precision. Each guard length, each flick of the clipper, each point-cut on top contributes to a finished product that looks effortless. It’s not effortless. It’s architecture. And when you get it right — when the gradient is seamless, the edges are sharp, and the top has texture — the skin fade is the most impactful men’s haircut in existence.
Zero to full length. One seamless gradient. That’s the skin fade. ✂️
