How to Cut Your Own Hair: The Complete Guide for Men
You don’t need a barber for every cut. You need a system.
Here’s what your barber won’t tell you: 70% of a good haircut is the system, not the skill. The sectioning, the guard progression, the blending technique — these are repeatable, learnable steps that don’t require years of apprenticeship. What does require skill is the fade, the razor work, and the finishing. But the bulk of a men’s haircut — the length reduction, the layering, the basic shape — is mechanical. This guide covers the complete system: from sectioning to styling, with every step explained so you can maintain your own hair between barber visits or build a full DIY routine.
Step 1: Gather Your Tools and Set Up Your Station
Timing: 5-10 minutes
Prerequisites: Clippers with guard set (#1-#8), Hair-cutting shears, Rat-tail comb, Sectioning clips, Spray bottle, Handheld mirror, Barber cape or towel
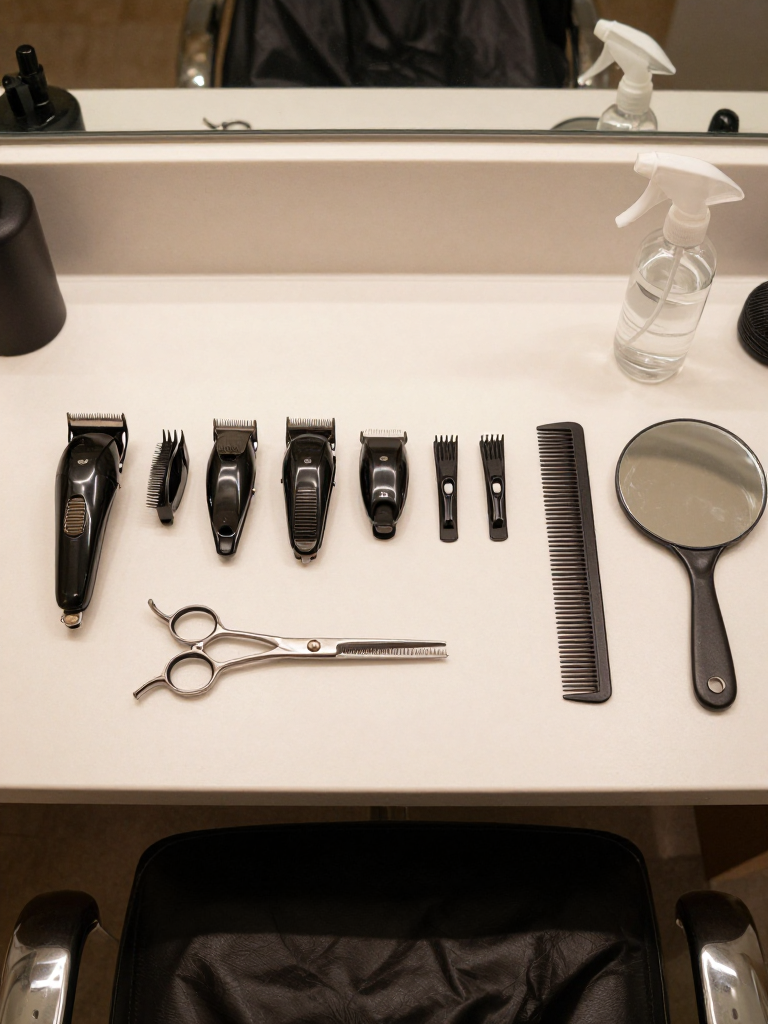
Before you touch your hair, set up your station. You need: clippers with a full guard set (#1 through #8), sharp hair-cutting shears (not kitchen scissors — the difference is night and day), a rat-tail comb, 4-6 sectioning clips, a spray bottle with water, a handheld mirror, and a barber cape or old towel. Lay everything out in order of use. The most common DIY haircut mistake is reaching for the wrong guard mid-cut and creating a line you can’t blend out. Having everything in order prevents this. Stand in front of a large mirror with good overhead lighting — natural light is ideal, but a bright bathroom works. Position the handheld mirror where you can see the back of your head.
Step 2: Section Your Hair with the Crown as Your Anchor
Timing: 5 minutes
Prerequisites: Rat-tail comb, Sectioning clips, Mirror
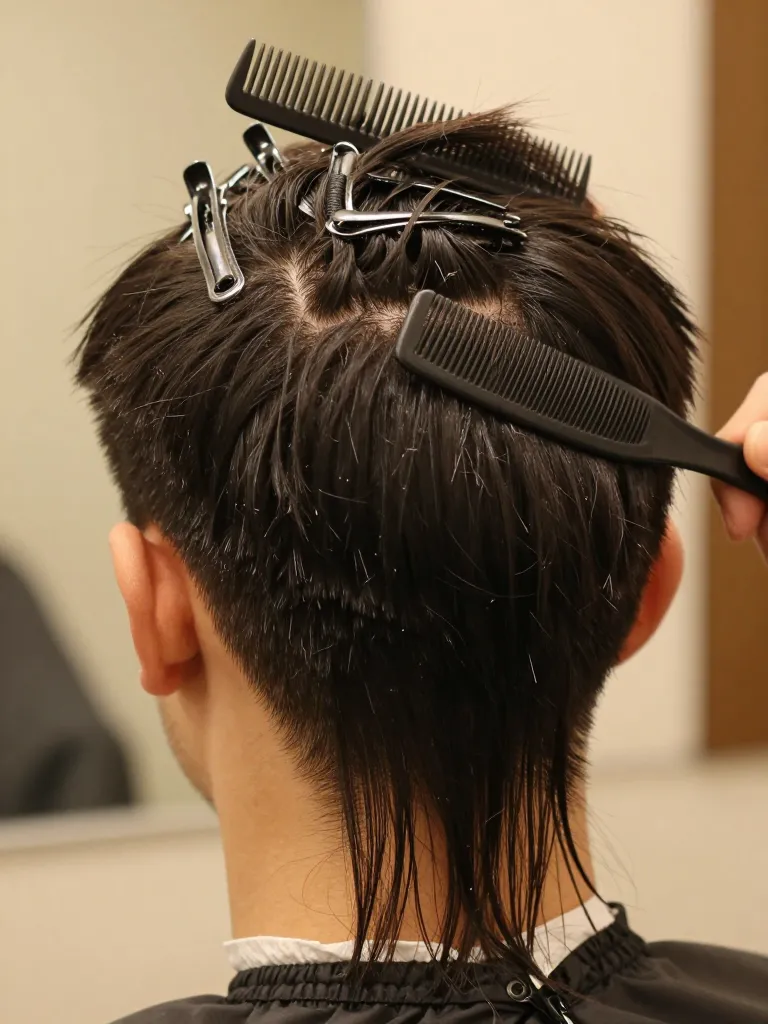
Sectioning is the foundation of every good haircut. The crown — the highest point on the back of your head — is your anchor. Using the rat-tail comb, create a curved part from ear to ear, passing through the crown apex. Clip everything above this part up and out of the way. This is your ‘top’ section — it stays longer. Everything below this part is your ‘sides and back’ section — this gets cut first. The part line should follow the natural curve of your head, not go straight across. A curved part creates a natural-looking graduation. A straight part creates a visible line where short meets long.
Step 3: Cut the Sides and Back with Guard Progression
Timing: 15-20 minutes
Prerequisites: Clippers with guards (#2, #3, #4), Handheld mirror
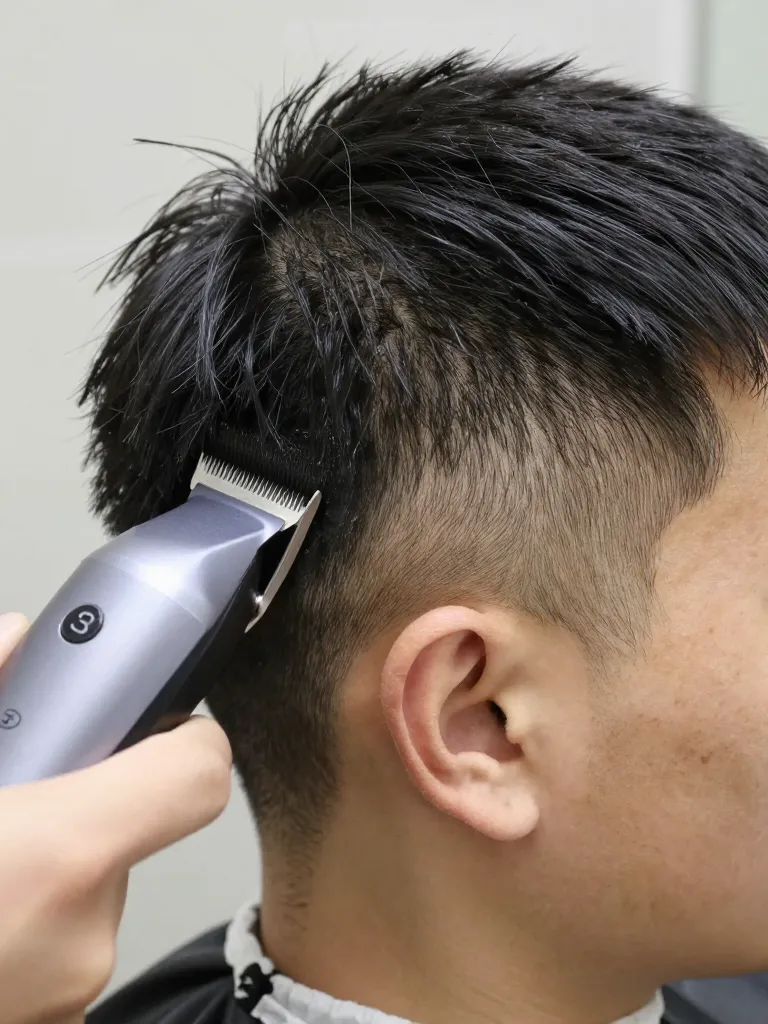
Starting with the sides and back (below your crown part), use clippers with a guard progression. Start with a #2 guard at the bottom (near the neckline and ears). Work upward, switching to a #3 guard halfway up, then a #4 guard near the crown part line. This creates a natural graduation — shorter at the bottom, longer at the top. Move the clippers in an upward motion, flicking out at the end to blend the guard transitions. Don’t press hard — let the clippers do the work. The key is consistency: use the same speed and pressure on both sides. Check your work with the handheld mirror after each side.
Step 4: Blend the Top into the Sides
Timing: 10-15 minutes
Prerequisites: Sharp shears, Comb, Sectioning clips
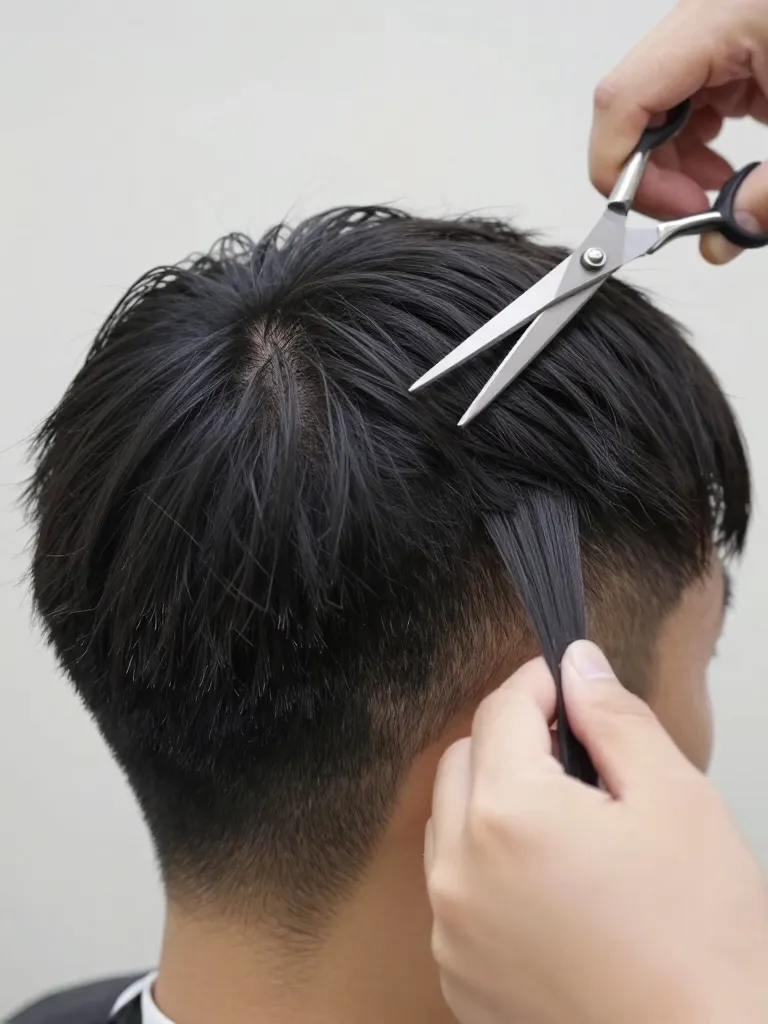
Release the clipped top section. Comb it forward and down. Now blend the top into the sides — this is where most DIY haircuts fail. Take horizontal sections along the transition line (where the top meets the sides). Hold each section between your fingers at a 45-degree angle and point-cut into the ends. This creates a gradual blend from the longer top to the shorter sides. The angle of your fingers determines the blend: steeper angle = more gradual blend. Work from the front to the back, checking symmetry with the mirror after each section. The goal is no visible line where short meets long — just a smooth gradient.
Step 5: Texturize the Top for Movement
Timing: 10-15 minutes
Prerequisites: Sharp shears, Comb, Mirror
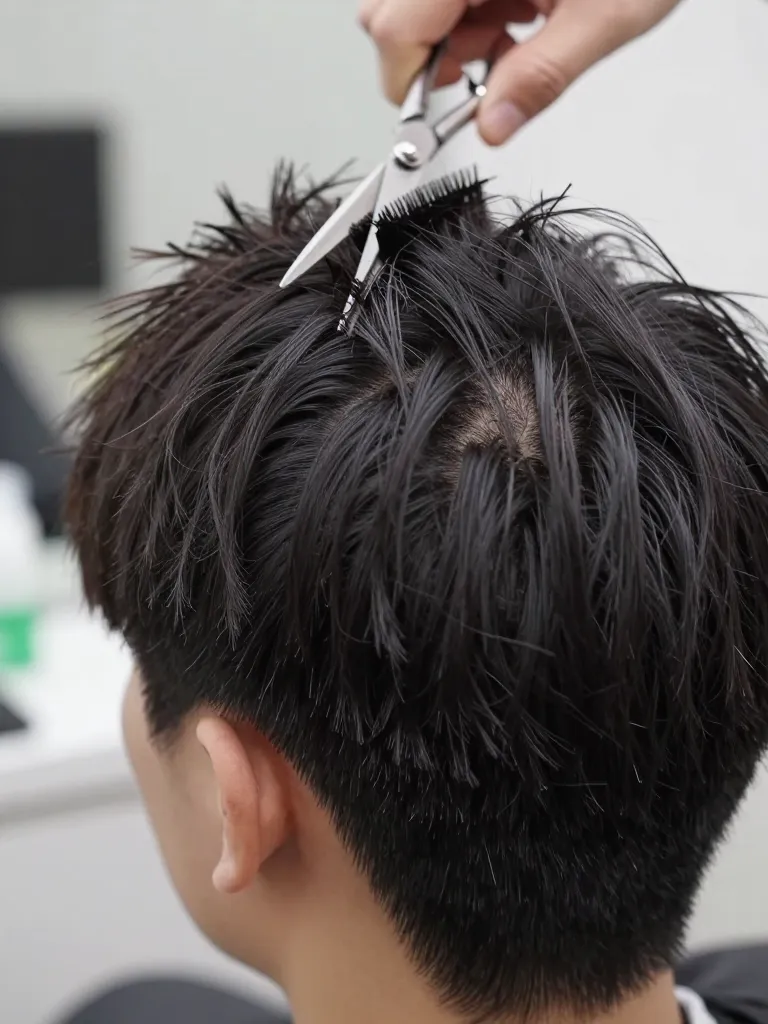
The top needs texturing to avoid looking like a helmet. Take vertical sections through the top and point-cut into the ends at steep angles — 60 to 70 degrees. This removes weight and creates the piece-y, choppy texture that makes a haircut look intentional rather than uniform. The crown should be 2-3 inches (enough for volume when styled). The fringe should be 2-3 inches, cut at an angle so it’s shorter in the center and longer at the temples. Work from front to back, checking length and texture with each section. After texturing, tousle the top with your fingers — if it falls into piece-y chunks with visible separation, the texture is right. If it clumps together in a solid mass, you need more point-cutting.
Step 6: Define the Neckline and Sideburns
Timing: 5-10 minutes
Prerequisites: Clippers with #1 guard, Straight razor or trimmer, Handheld mirror
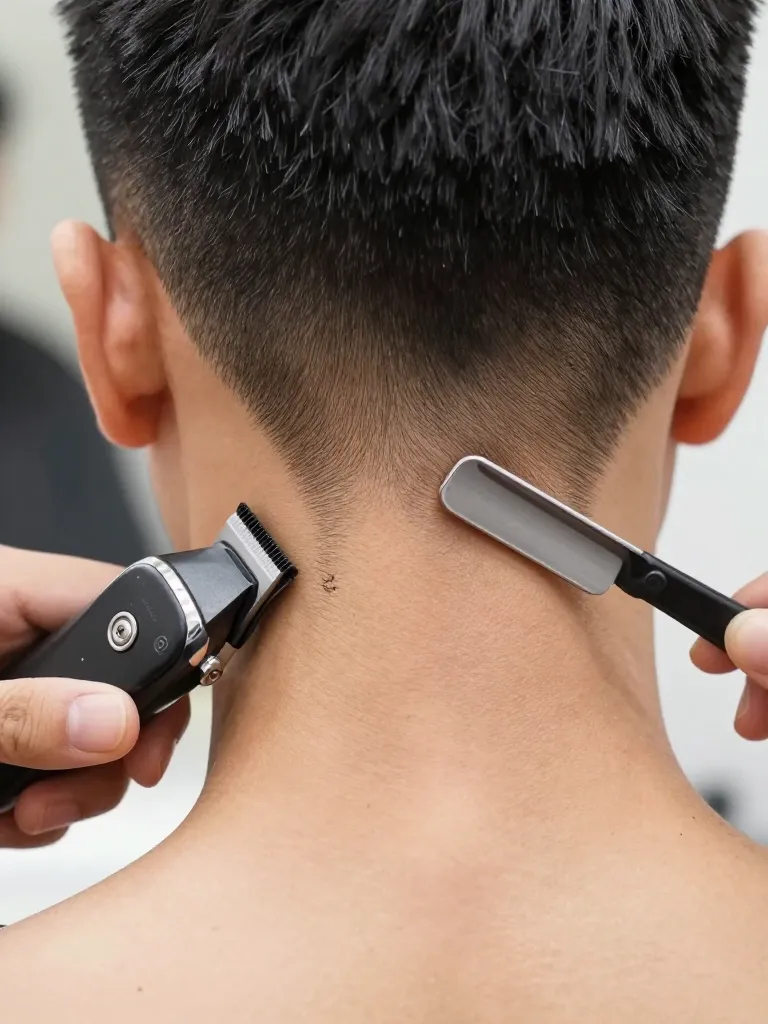
The neckline and sideburns are the finishing details that separate a DIY haircut from a professional one. For the neckline, use a #1 guard and create a clean U-shape following your natural hairline. Don’t go too high — the neckline should sit at the natural crease where your neck meets your skull. For the sideburns, use a straight razor or trimmer to create a clean, angled line. The sideburn should end at the middle of your ear — higher looks severe, lower looks dated. The edges should be crisp and symmetrical. Check with the handheld mirror — if one sideburn is higher than the other, you’ll notice it every time you look in the mirror.
Safety Notes
- Always use sharp hair-cutting shears — dull blades crush the hair cuticle and cause visible split ends
- Never cut more than 1 inch at a time — wet hair looks longer than dry hair, and you’ll over-cut
- If you’re unsure about a guard length, start longer — you can always go shorter, but you can’t add hair back
Pro Tips
- Start longer than you think: Wet hair is deceptively long — always start with a longer guard and work shorter
- Check symmetry obsessively: Use the handheld mirror after every section — asymmetry is the #1 DIY haircut mistake
- Point-cut everything: Blunt cuts create visible horizontal lines — point-cut every section for natural texture
- Blend with damp hair: Wet hair is easier to section and blend, but check the final result dry
- Clean your clippers between passes: Hair buildup on the blade creates uneven cuts — brush after every 2-3 passes
- Invest in good shears: A $30 pair of hair-cutting shears outperforms $5 kitchen scissors every time
Cutting your own hair isn’t about being cheap — it’s about having a system. The barber isn’t magic. They have a system, a sequence of steps they’ve repeated thousands of times. You can learn that system. It takes practice, patience, and a willingness to check your work with a mirror after every step. But once you have it, you’ll never depend on a barber for a basic cut again. You’ll save money, save time, and — most importantly — you’ll have a haircut that fits your head, not the barber’s template.
Your head. Your system. Your rules. ✂️
