Axolotl Gill Mullet Tutorial: How to Build Feathery Fiber-Optic Extensions
Six gill stalks, fiber optics, and the uncanny valley between cute and unsettling
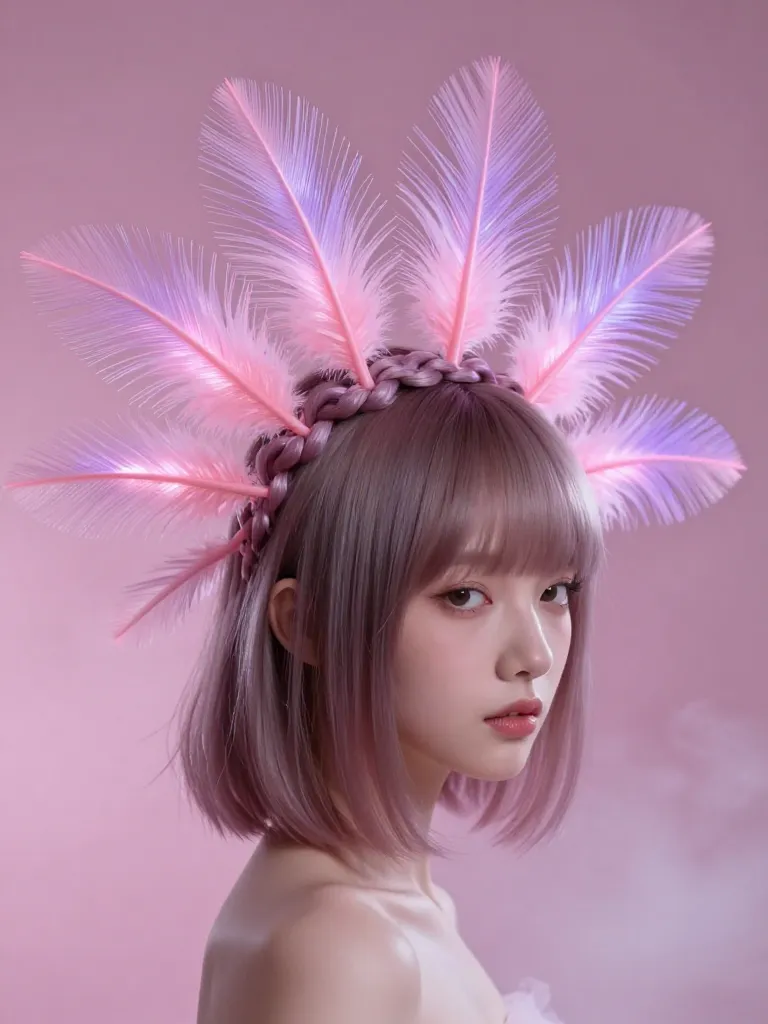
Axolotls are the internet’s favorite permanently-juvenile salamander. They’re cute, they’re pink, and they have feathery external gills that make them look like they’re perpetually underwater cosplayers. If you’ve ever looked at your axolotl’s gill stalks and thought “I want those on my head,” this tutorial is your permission slip. The Axolotl Gill Mullet uses fiber-optic strands and flexible silicone cores to create six translucent, glowing gill extensions that cascade from the back of your head. It’s deceptively delicate-looking but structurally sound. Let’s build it.
Step 1: Prepare the Crown Anchor System
- Hair at least 5 inches long in the back
- Silicone-lined metal loops (6mm)
- Sectioning clips
- Rat-tail comb for precise parting
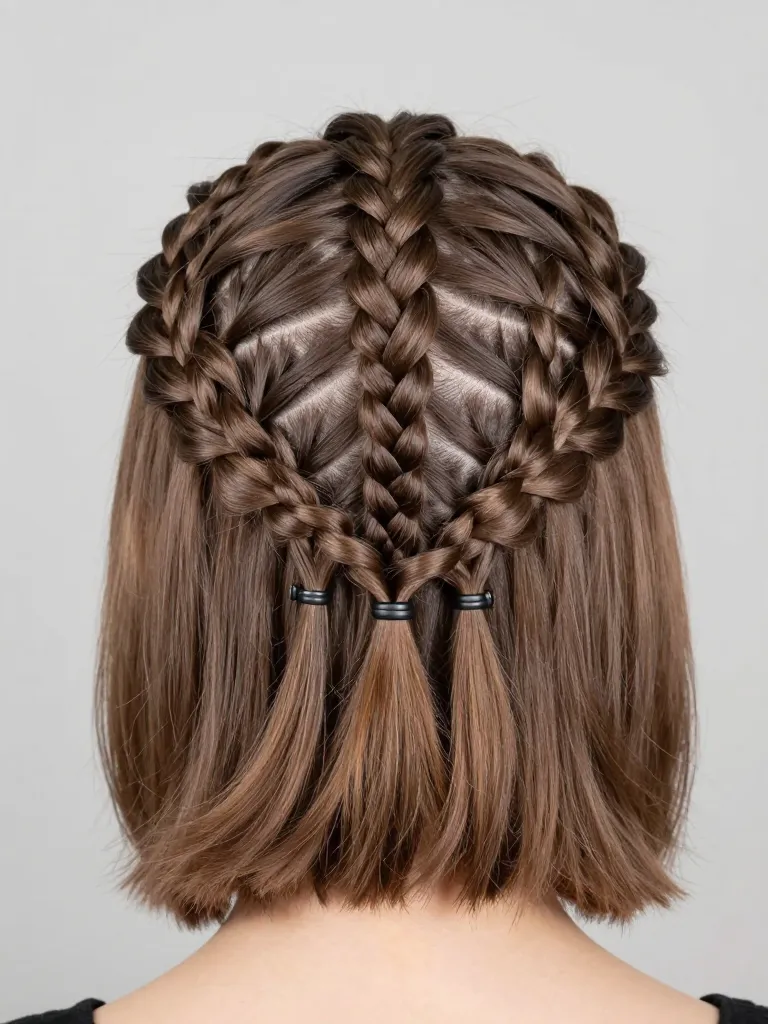
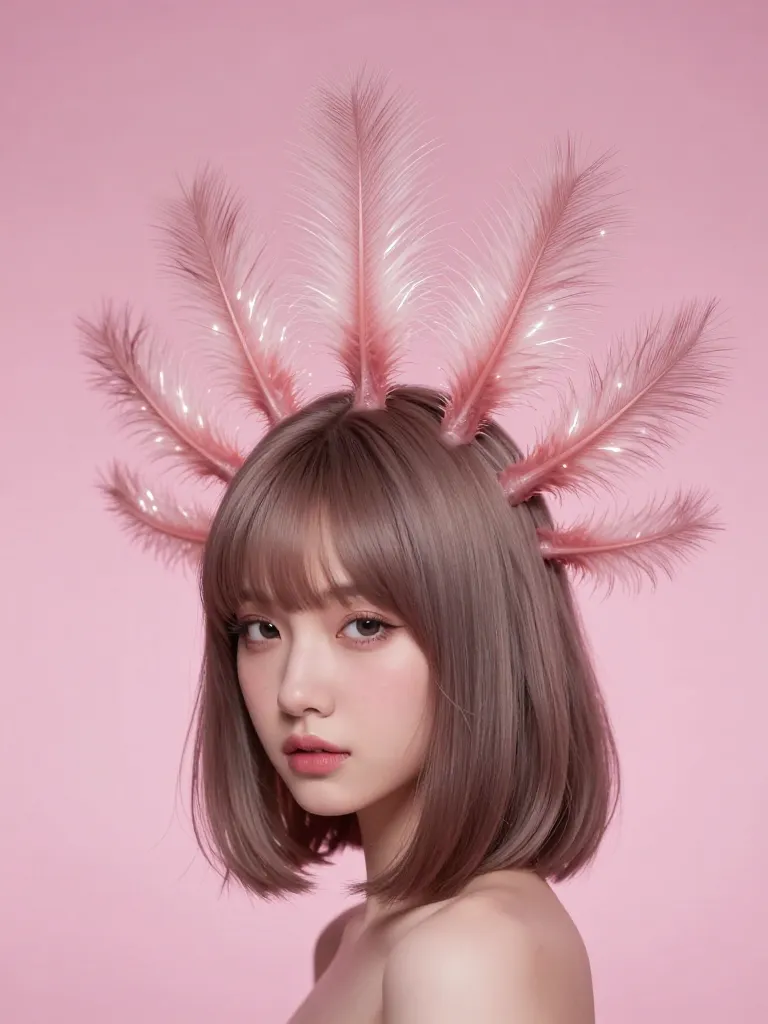
The Axolotl Gill Mullet needs a radial anchor — six braids radiating from a single crown point, like the spokes of a wheel. Part your hair from the center crown down to the occipital bone in six equal sections (think clock positions: 12, 2, 4, 6, 8, 10). Dutch braid each section from the crown outward, keeping tension consistent. At the end of each braid, thread a small silicone-lined metal loop — the silicone prevents metal-on-hair friction that causes breakage. These six loops are where your gill stalks will connect. The front of your hair is cut into a soft, face-framing bob — think blunt ends, jaw-length, with curtain bangs. The contrast between the soft front and the gill cascade in the back is what makes this mullet sing.
Step 2: Build the Gill Stalk Cores
- 3mm flexible silicone cord
- Small jewelry hooks (6)
- Fiber-optic hair strands (coral pink + lavender)
- Transparent thread
- Scissors
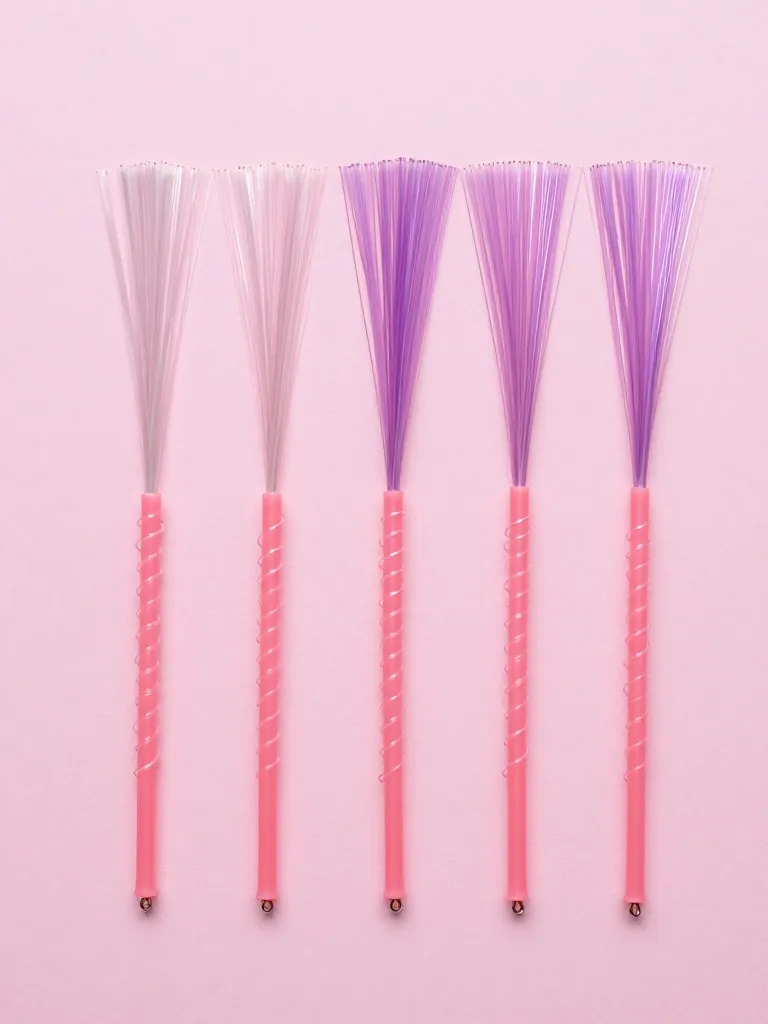
Each gill stalk is built on a 3mm flexible silicone cord — this gives you the soft, organic movement that axolotl gills have. Cut six cords in graduated lengths: two at 6 inches (inner pair), two at 8 inches (middle pair), two at 10 inches (outer pair). This graduated sizing mimics how real axolotl gills are shorter near the head and longer toward the tips. At one end of each cord, attach a small jewelry hook that will clip into your braided anchor loops. The hooks should open and close easily with finger pressure — no pliers needed for field adjustments. Bundle 15-20 fiber-optic strands (mix coral pink and lavender) alongside each silicone cord, securing them with thin transparent thread wrapped in a spiral every inch. The fiber optics should extend 1-2 inches beyond the silicone cord tip to create the feathery filament effect.
Step 3: Connect Battery Packs and Test Lighting
- Micro battery packs (CR2032-powered, 1 unit with 6-way splitter recommended)
- Dimmed room for testing
- Colored tape for marking stalk positions
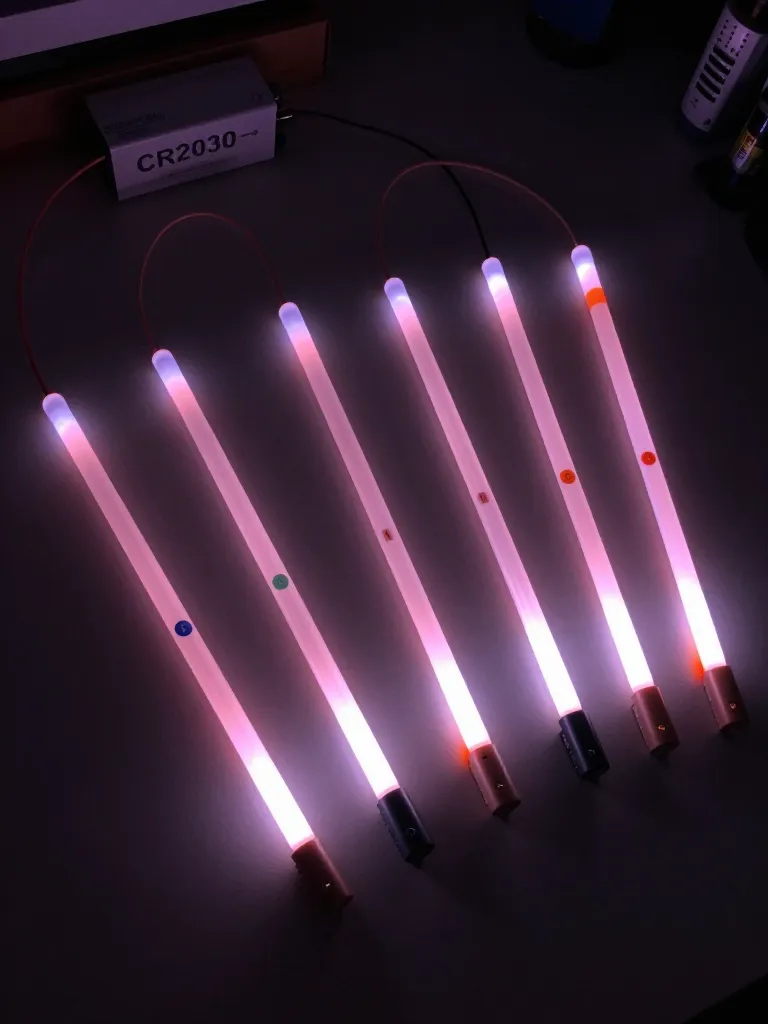
Before attaching anything to your head, test the full lighting system. Connect each gill stalk’s fiber-optic bundle to a micro battery pack (CR2032-powered units work best — they’re coin-sized and weigh almost nothing). Turn them on in a dimmed room to verify even light distribution. You should see a soft, ethereal pink-purple glow emanating from the fiber tips, with the light diffusing along the entire length of each stalk. If any stalk has dark spots, the fibers are kinked — gently straighten them. If the color is uneven, check your fiber-optic color mix ratio. Once all six stalks glow evenly, mark each stalk with a small piece of colored tape corresponding to its anchor position (1-6) so you don’t mix them up during attachment.
Step 4: Attach Gill Stalks to Crown Anchor
- Completed gill stalks (tested and marked)
- Crown anchor system
- Battery pack connected and tested
- Spirit gum (optional, for extra security)
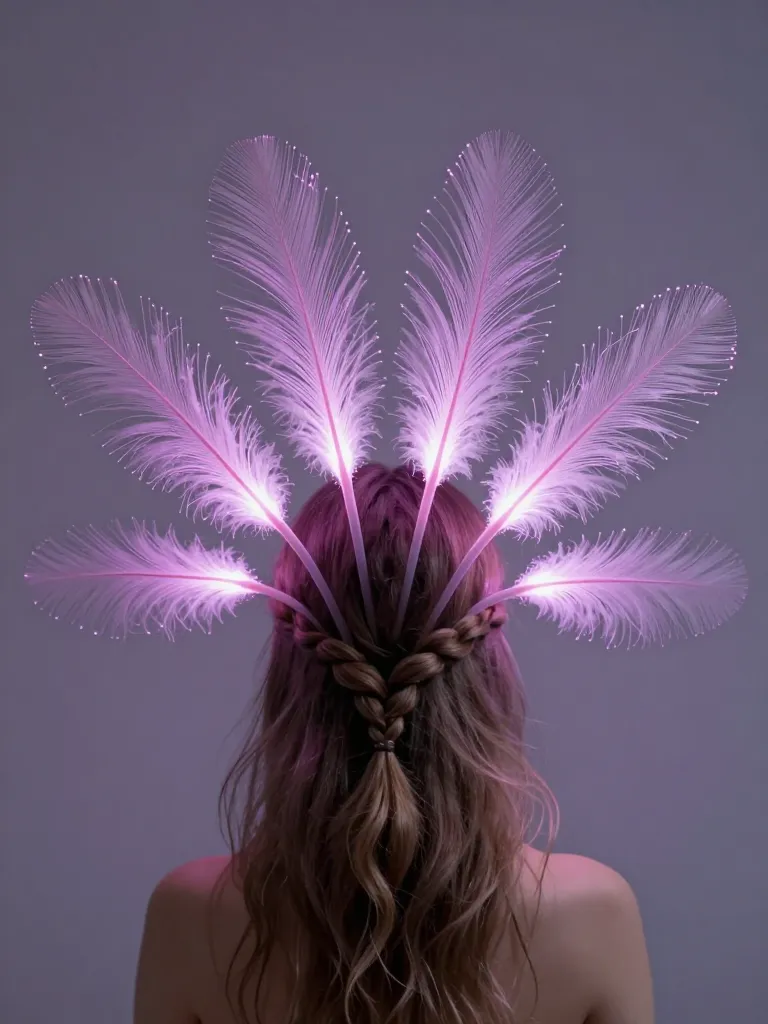
Clip each gill stalk’s hook into its corresponding anchor loop on the braided crown. Work from the inner pair (shortest) outward to the outer pair (longest). The inner stalks should frame the back of your head closely — almost touching the nape. The outer stalks arc outward and down, creating the fan-like gill spread that axolotls display when they’re feeding or agitated. Connect all fiber optics to the battery pack (hidden inside the central crown braid). Test the full assembly by moving your head — the stalks should sway gently with movement, mimicking the natural undulation of axolotl gills in water. If any stalk swings too wildly, shorten the silicone cord slightly by tucking the excess into the anchor loop.
Step 5: Style the Front and Final Adjustments
- Round brush
- Light-hold styling cream
- Mirror (front and back view)
The front of the Axolotl Gill Mullet should be soft and approachable — it’s the “cute” half of the cute-unsettling equation. Style your bob with a round brush for gentle inward curves at the jaw. Apply curtain bangs with a center part, sweeping them slightly outward. Use a light-hold cream (not spray — you want movement, not stiffness). The back gill cascade should be the visual focus, so keep the front simple. Final adjustments: check gill spacing in a mirror with the lights on AND with the fiber optics active. The daytime look should read as an avant-garde mullet with unusual translucent extensions. The nighttime/event look should read as a bioluminescent creature emerging from the deep. Both should make people do a double-take.
Why This Works
The axolotl gill design succeeds because it mimics both the anatomy and the physics of real gill stalks. Axolotl gills are supported by cartilaginous rods (ceratobranchials) that give them structure while allowing fluid movement — your silicone cord cores do the same job. The fiber-optic filaments branching off each stalk replicate the feathery gill filaments (fimbriae) that increase surface area for gas exchange. In your hair, they increase surface area for light dispersion. The graduated length (short inner, long outer) matches the natural gill architecture where the three pairs decrease in size from posterior to anterior. The radial braided anchor distributes load evenly across the crown, preventing the single-point failure that causes extensions to rip out. Even the battery placement matters — hiding it in the central crown braid mimics how axolotl gills attach at the hyoid arch, which is roughly center-mounted on the skull.
Safety Warnings:
- Silicone-lined anchor loops are mandatory — bare metal on hair causes friction breakage and scalp irritation
- Fiber-optic strands can snap and create sharp ends — always trim with sharp scissors and inspect tips before wearing
- CR2032 batteries must be stored securely away from children and pets — swallowing hazard
- If any gill stalk pulls uncomfortably on its anchor braid, redistribute weight immediately to prevent traction damage
Pro Tips
More Cryptid Mullet Styles
- Bioluminescent Bobbit Worm Mullet — UV-reactive segmented tendrils for deep-sea enthusiasts
- Cybernetic Raccoon Mullet — LED circuit traces and tail banding for nocturnal schemers
- All 4 Cryptid Mullet Styles — back to the full overview
The Axolotl Gill Mullet is the rare hairstyle that looks good in both a coffee shop and an aquarium. During the day, it’s an avant-garde mullet with unusual translucent extensions. At night, under the right light, it becomes something genuinely otherworldly — a cascade of glowing gill stalks that move when you move. Your axolotl will never know you’re matching it. But you’ll know. And that’s enough.
Neoteny never looked this good. 🦎✨
