How to Sculpt a Bioluminescent Bobbit Worm Mullet That Glows Under Black Light
A complete structural guide for deep-sea-obsessed mullet enthusiasts
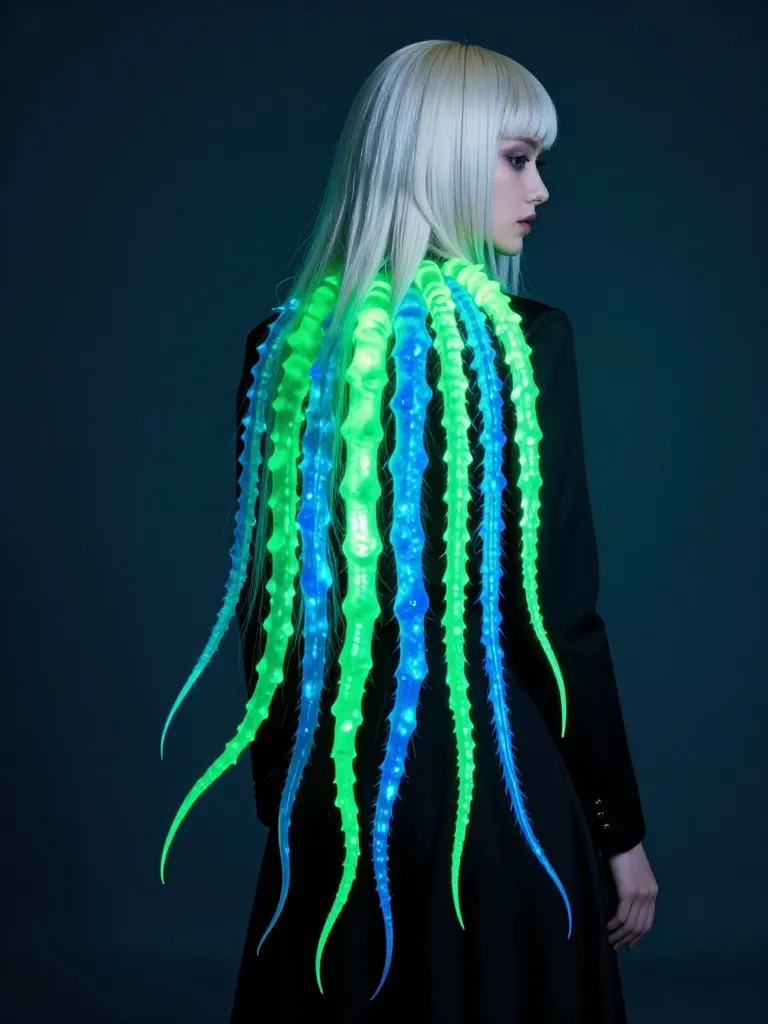
Standard hair gel collapses under the weight of vertical sculpting. Mousse gives you volume for about forty minutes before gravity wins. If you’re trying to build segmented, UV-reactive tendrils that hang off the back of your head like a bobbit worm emerging from its burrow, you need an entirely different approach. This isn’t styling. This is structural engineering with hair as the medium. You’re about to learn how to build a mullet that’s visible in daylight and absolutely terrifying under black light.
Step 1: Build the Braided Anchor Base
- Hair at least 6 inches long in the back
- Metal anchor rings (6-8mm inner diameter)
- Strong braiding thread or fishing line
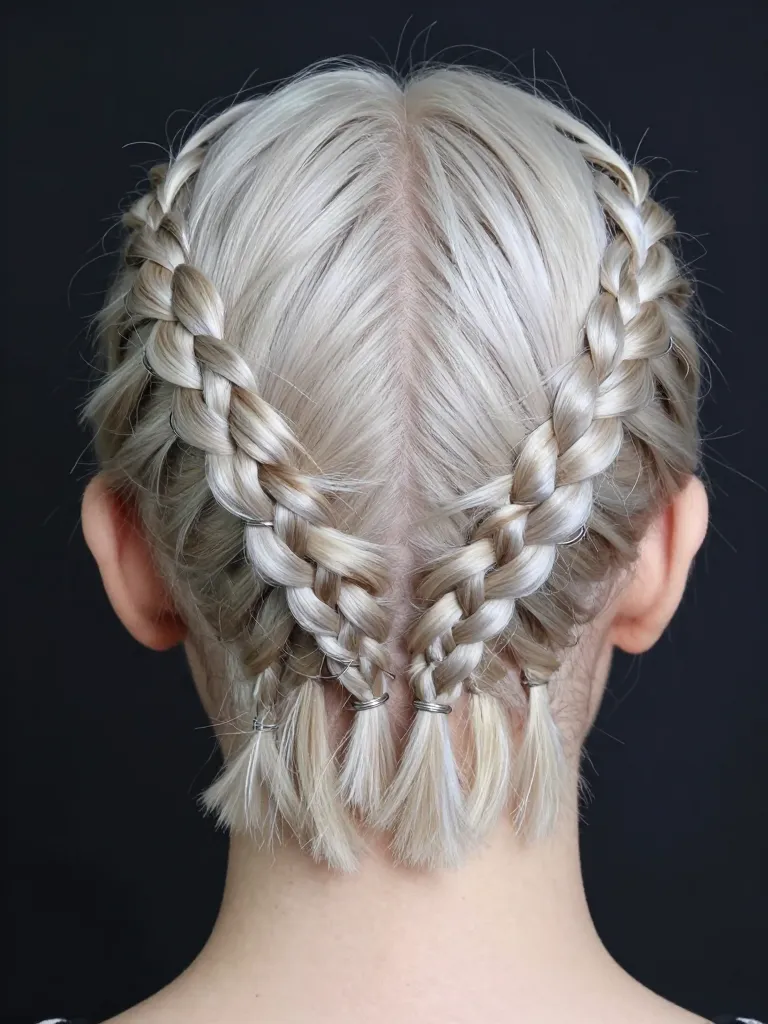
Everything starts with the anchor. Section the back of your head from the crown to the nape into 6-8 parallel horizontal sections. Dutch braid each section tightly, incorporating small metal anchor rings (available in jewelry-making supply kits) every two inches along each braid. These rings are where your tendrils will attach later. The braids need to be brutal-tight — if they’re loose, the weight of the tendrils will pull them out within an hour. Braid all the way to the ends and secure with thread wrapping (not elastic bands, they’ll snap under load). The front of your hair stays unbraided — this is your mullet’s “business in the front” territory. Cut the front into a textured crop, 2-3 inches on top, tight on the sides.
Step 2: Construct the Wire-Core Tendrils
- 16-gauge floral wire
- Synthetic hair fiber (neon green + electric blue)
- Thin craft wire for wrapping
- UV-reactive pigment gel
- Flexible fabric medium
- Wire cutters and round-nose pliers
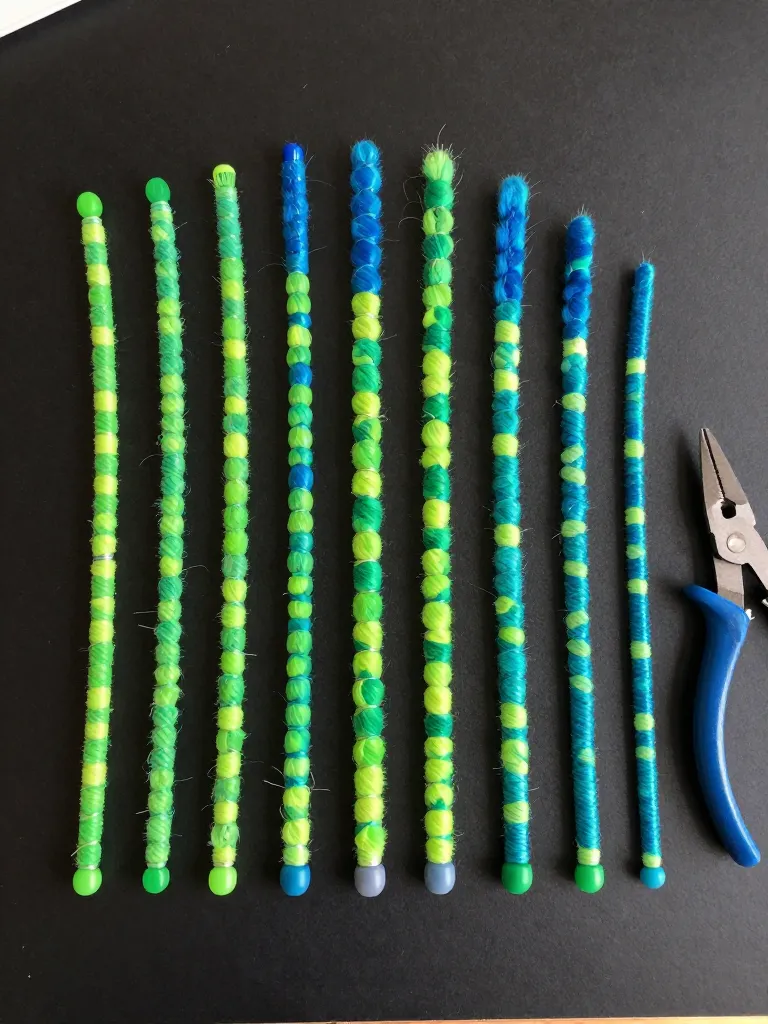
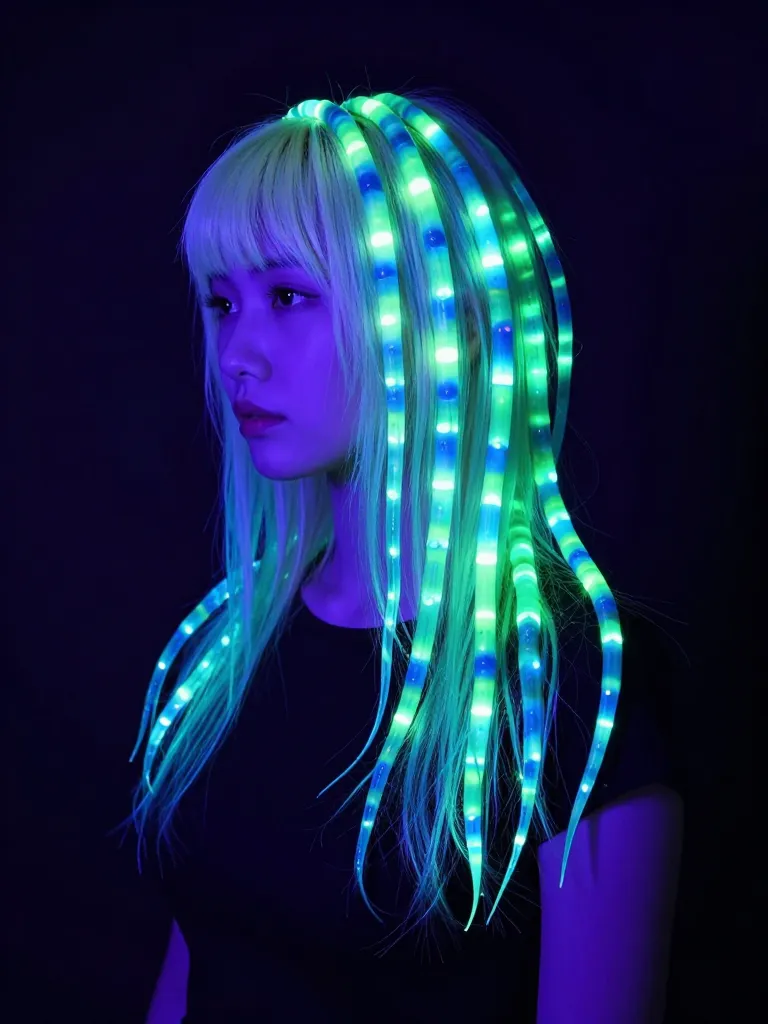
Each tendril is a custom-built unit. Cut 16-gauge floral wire into 10-14 inch lengths (vary the lengths for organic realism — bobbit worms aren’t uniform). Bend a small loop at one end — this is your attachment point for the anchor ring. Starting from the loop, wrap synthetic hair fiber (pre-dyed in neon green and electric blue) around the wire using a wire-wrapping technique: hold the fiber bundle against the wire, wrap thin craft wire around both in a spiral every half-inch. Build 8-12 tendrils total. Each one should have 3-4 visible “segments” where the wrapping is thicker, mimicking the body segments of a bobbit worm. Once wrapped, coat each tendril in UV-reactive pigment gel mixed with a flexible fabric medium. Let them dry completely — 2-3 hours minimum.
Step 3: Attach Tendrils to the Anchor System
- Completed braided anchor base
- Completed wire-core tendrils
- Needle-nose pliers
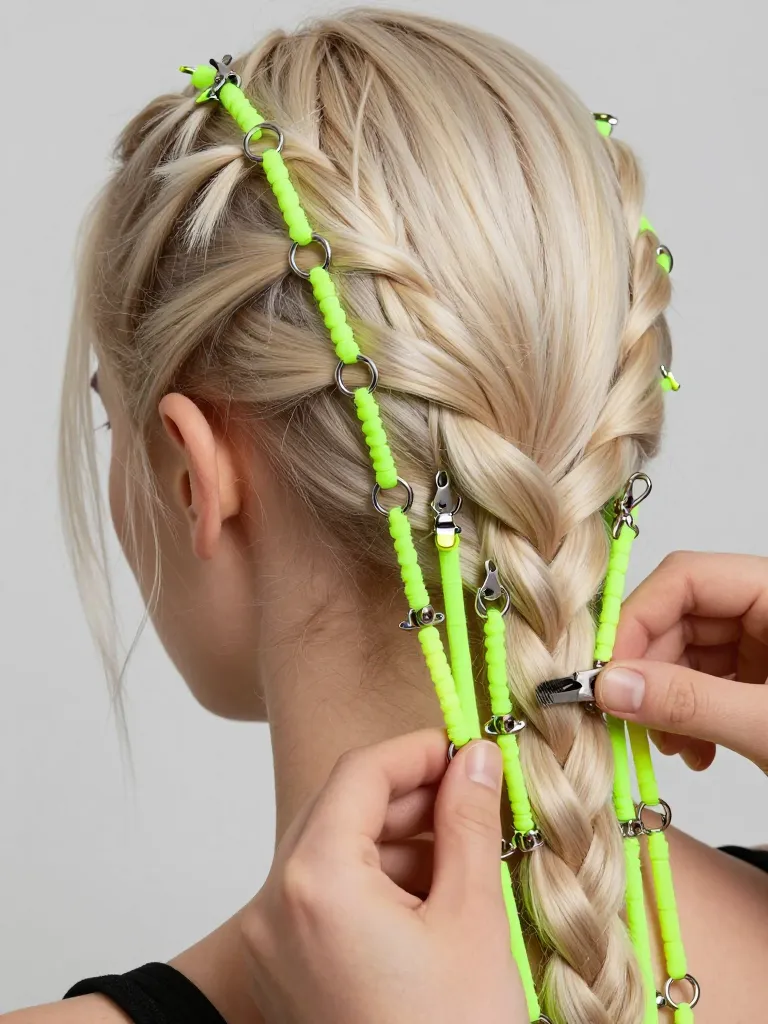
Open each tendril’s loop end slightly with pliers and thread it through the corresponding anchor ring on your braided base. Close the loop securely — you want a snug fit that won’t pop open when you move your head. Arrange the tendrils in a cascading pattern: shortest (10 inches) at the top near the crown, longest (14 inches) at the nape. This creates the natural bobbit worm silhouette — tapered and menacing. Test the weight distribution by shaking your head side to side. If one section feels heavier, redistribute tendrils to adjacent anchor points. Each anchor ring should hold no more than 2 tendrils to prevent braid strain.
Step 4: Apply UV Pigment and Final Texture
- UV-reactive pigment gel
- Hair-safe setting spray
- UV flashlight for checking coverage
- Flexible-hold hairspray
With tendrils attached, it’s time for the final UV pigment pass. Mix UV-reactive gel with a small amount of hair-safe setting spray for adhesion. Apply it in segmented bands along each tendril — thicker at the segment nodes, thinner between them. This reinforces the bobbit worm anatomy. Use a UV flashlight to check coverage as you go. The front of your mullet gets a light mist of UV setting spray for a subtle glow that contrasts with the intense back tendrils. Finish with a flexible-hold hairspray over the entire structure. The front should look sharp and intentional. The back should look like something evolved in a hydrothermal vent.
Step 5: Maintenance and Preservation
- Silk or satin pouch
- Neck-cutout pillow or travel neck pillow
- UV flashlight
- UV pigment gel for touch-ups
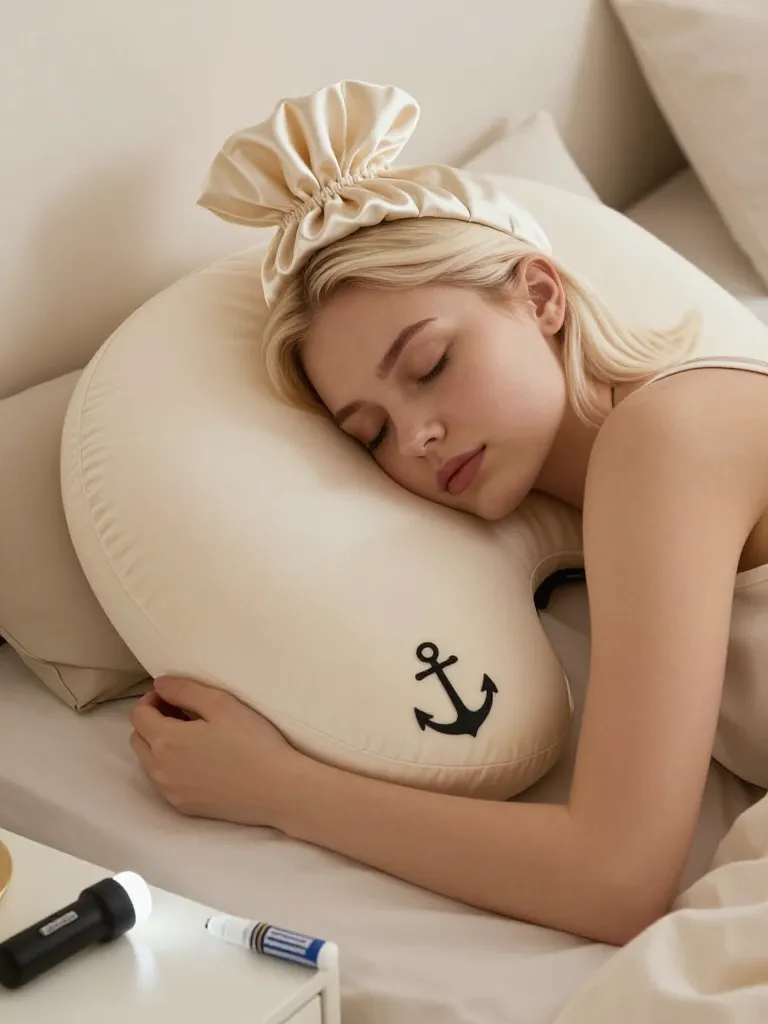
Sleeping with a bobbit worm mullet requires strategy. Never sleep with tendrils loose — they’ll tangle irreversibly by morning. Gather them gently into a loose silk pouch (a satin drawstring bag works) and secure it at the top of your head. Use a neck-cutout pillow or a travel neck pillow to keep pressure off the back. For daily refresh: mist the tendrils with water, re-apply UV pigment to any sections that have faded (check under black light), and re-secure any loose anchor connections. The wire cores hold their shape indefinitely, but the hair wrapping may fray at the tips after 5-7 wears — trim and re-wrap frayed sections promptly to prevent unraveling. Store unused tendrils hanging vertically to prevent kinking.
Why This Works
The bobbit worm mullet works because it separates the two jobs a mullet has to do. The front is a standard precision cut — no structural load, no special engineering. The back is a load-bearing extension system. By anchoring to Dutch braids with metal rings, you distribute the weight of 8-12 tendrils across your entire occipital scalp rather than concentrating it at attachment points. The wire cores give each tendril a poseable skeleton — they hold whatever shape you bend them into, unlike pure hair extensions that collapse under gravity. The segmented wrapping technique mimics actual bobbit worm anatomy (annelid body segments) while also serving a structural purpose: thicker nodes act as flex stops, preventing the tendril from bending at a single weak point. The UV pigment layer is cosmetic but also protective — the gel coating seals the hair fiber wrapping and extends the lifespan of each tendril by 3-4 wears.
Safety Warnings:
- Wire ends must be capped with rubber tips or hot glue — exposed wire near the scalp can cause cuts or punctures
- Prolonged tension on braided anchors causes traction alopecia — redistribute weight if any section feels tight
- UV-reactive pigments may irritate sensitive skin — always patch test 24 hours before full application
- Do not use heat tools above 150°F on UV-coated tendrils — pigment degradation releases mild irritants
Pro Tips
More Cryptid Mullet Styles
- Axolotl Gill Mullet — feathery fiber-optic gill extensions for amphibian enthusiasts
- Cybernetic Raccoon Mullet — LED circuit traces and tail banding for nocturnal schemers
- All 4 Cryptid Mullet Styles — back to the full overview
The bioluminescent bobbit worm mullet is not a casual weekend project. It’s a commitment to deep-sea aesthetics that requires wire work, pigment mixing, and a willingness to explain your hair to every single person you meet. But when the black light hits and those tendrils ignite in segmented neon glory, you’ll understand why bobbit worms are apex predators of the ocean floor. You’re now the apex predator of whatever room you walk into.
The abyssal zone called. It wants its aesthetic back. 🐙✨
