How to Get the 80s Shag Haircut at Home: The Complete DIY Guide
You don’t need a salon to get the layers. Here’s the technique that actually works.
A salon shag costs $80-150 and takes an hour of sitting in a chair while someone makes small talk. Doing it at home costs nothing after the first pair of shears, takes about 30 minutes, and you can mess up in the privacy of your own bathroom. The 80s shag is actually one of the easier cuts to DIY because the whole point is imperfection — uneven layers, textured ends, a little chaos. You’d have to try pretty hard to make it look bad. Here’s the step-by-step.
Step 1: Gather Your Tools
5 minutes
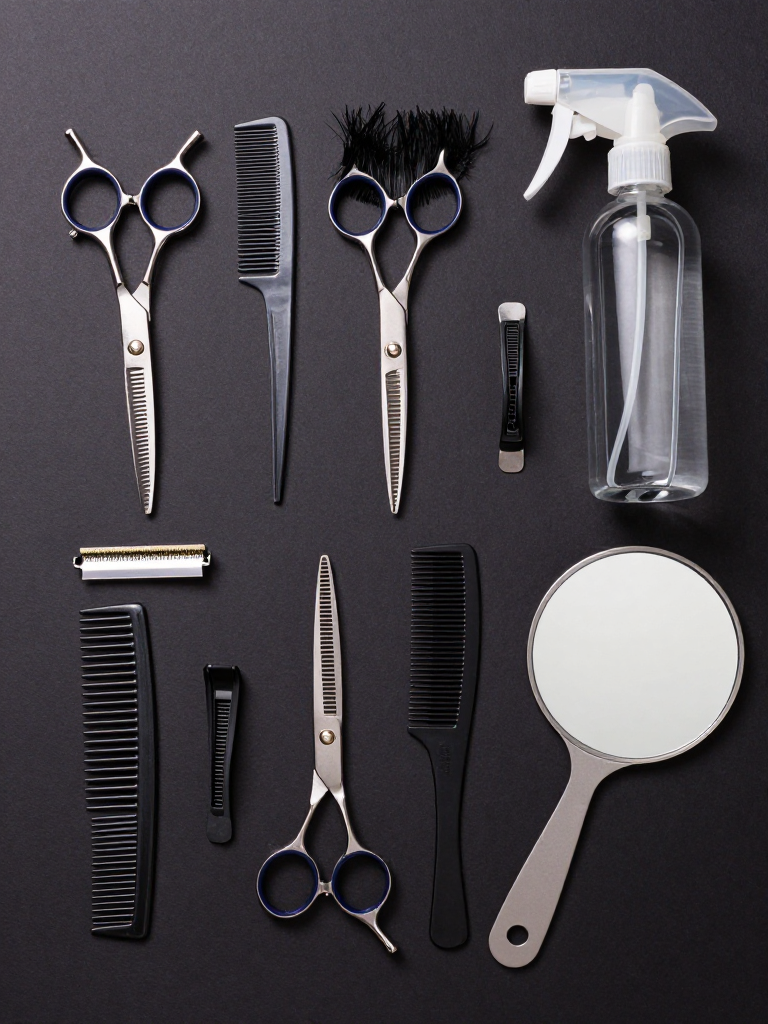
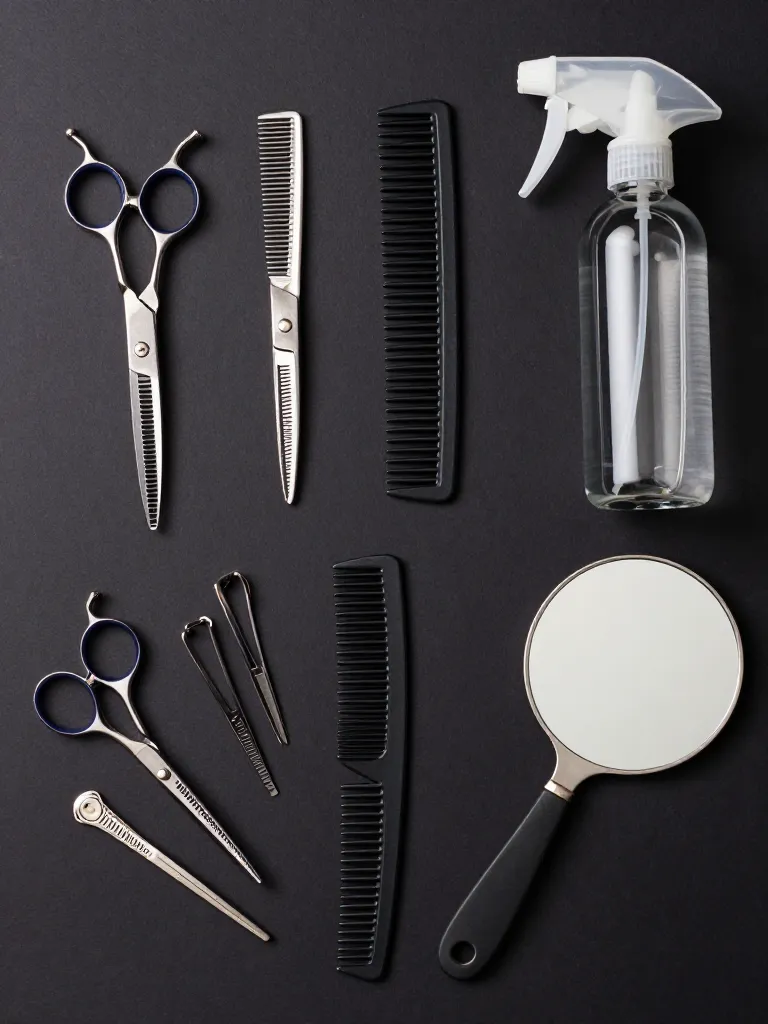
Prerequisites: Professional hair shears (not kitchen scissors), Razor comb, Sectioning clips (4-6), Spray bottle with water, Wide-tooth comb, Handheld mirror
You need sharp hair shears (not kitchen scissors — they’ll crush the hair and cause split ends), a razor comb for texturizing, sectioning clips, a spray bottle, a wide-tooth comb, and a handheld mirror for checking the back. The razor comb is the secret weapon — it’s what gives the shag its signature feathery texture without the precision required for point-cutting. Budget $15-25 for decent shears; they’ll last years if you don’t use them on anything but hair.
Critical: Dull scissors tear hair instead of cutting it — sharp shears are non-negotiable
Pro Tip: Cut on dry hair so you can see the actual length. Wet hair shrinks when it dries.
Step 2: Section Your Hair
5 minutes
Prerequisites: Step 1 complete, dry detangled hair
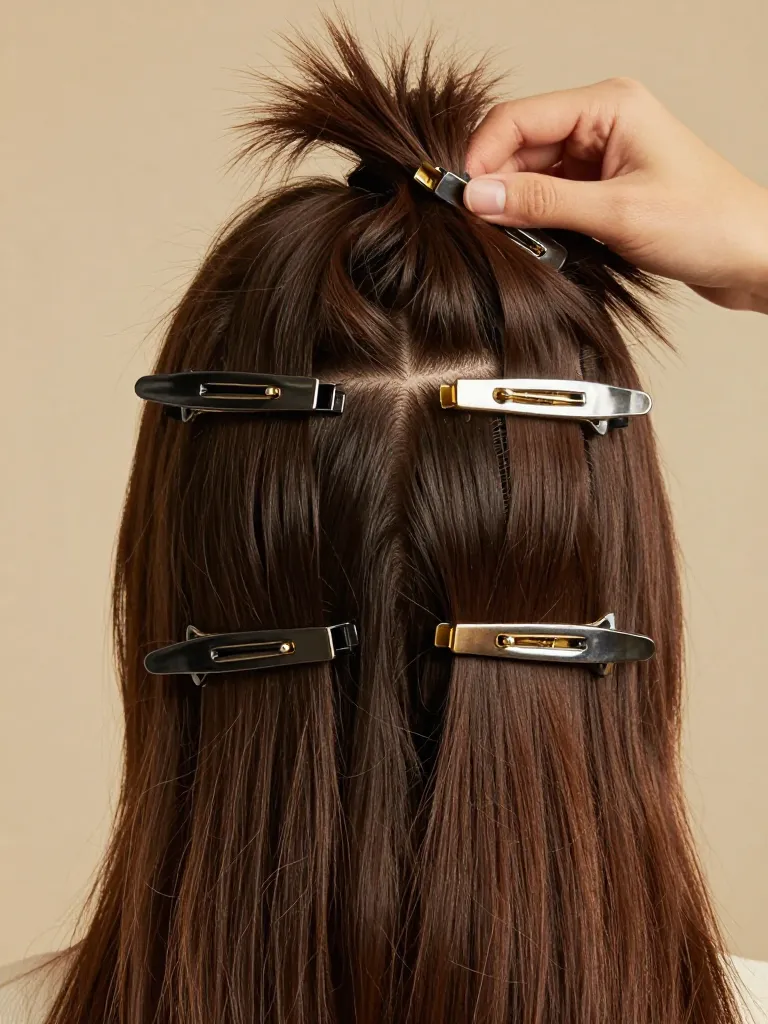
Start with dry, detangled hair. Part your hair down the middle from forehead to nape. Then create a horizontal part from ear to ear over the crown. You now have four sections: top, left side, right side, and back. Clip the top and sides out of the way. The back section is where you start because it sets the overall length. For a classic 80s shag, the back should hit your collarbone or just below. If your hair is already longer than that, you’re just cutting layers into existing length — not shortening the overall cut.
Critical: Part lines must be clean — messy sections create uneven layers
Pro Tip: Use the pointed end of a rat-tail comb for precise parting
Step 3: Cut the Back Guide
10 minutes
Prerequisites: Step 2 complete
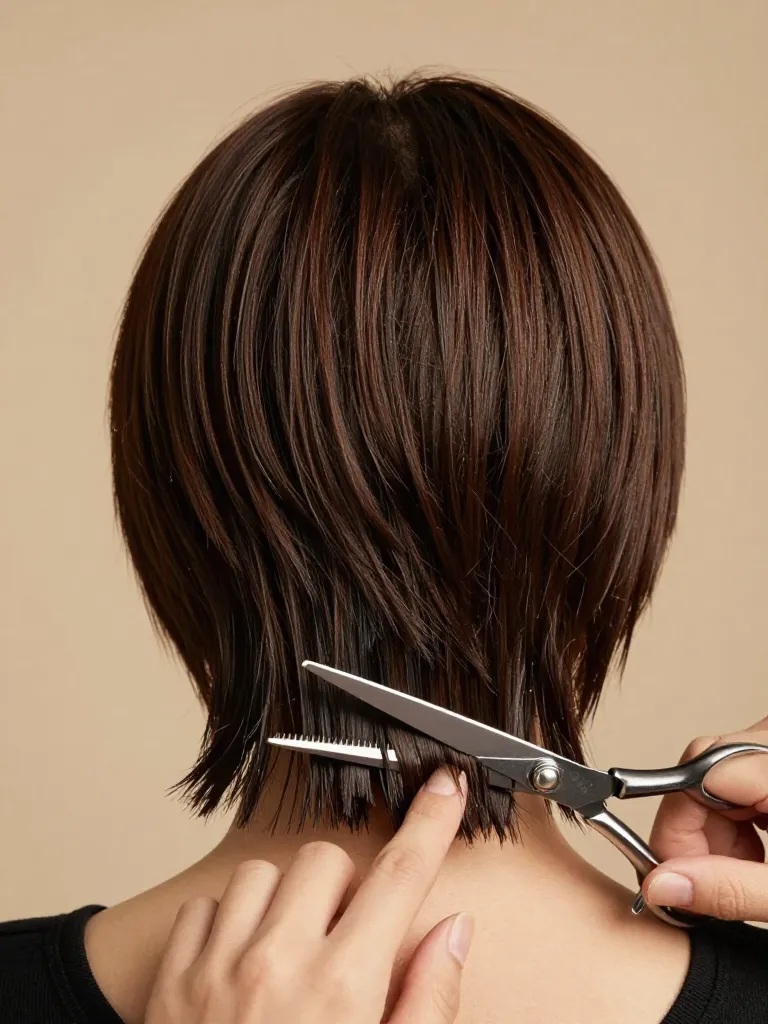
Let down the back section. Comb it straight down. Decide your longest length — for the 80s shag, this is usually collarbone to just below. Hold a small horizontal section between your index and middle fingers, pulling it straight out from the head at a 45-degree angle. Cut straight across at your chosen length. This is your guide — every other section in the back gets cut to match this length when pulled to the same angle. Work in small horizontal sections, moving upward from the nape. Each section should be about half an inch thick. Pull each section to the 45-degree angle and cut to match the guide. As you move up the head, the layers naturally get shorter because of the angle — that’s what creates the shag’s cascading effect.
Critical: Keep the 45-degree angle consistent — pulling straight down creates a blunt cut, not layers
Pro Tip: Cut less than you think you need. You can always go shorter.
Step 4: Cut the Sides and Crown Layers
10 minutes
Prerequisites: Step 3 complete
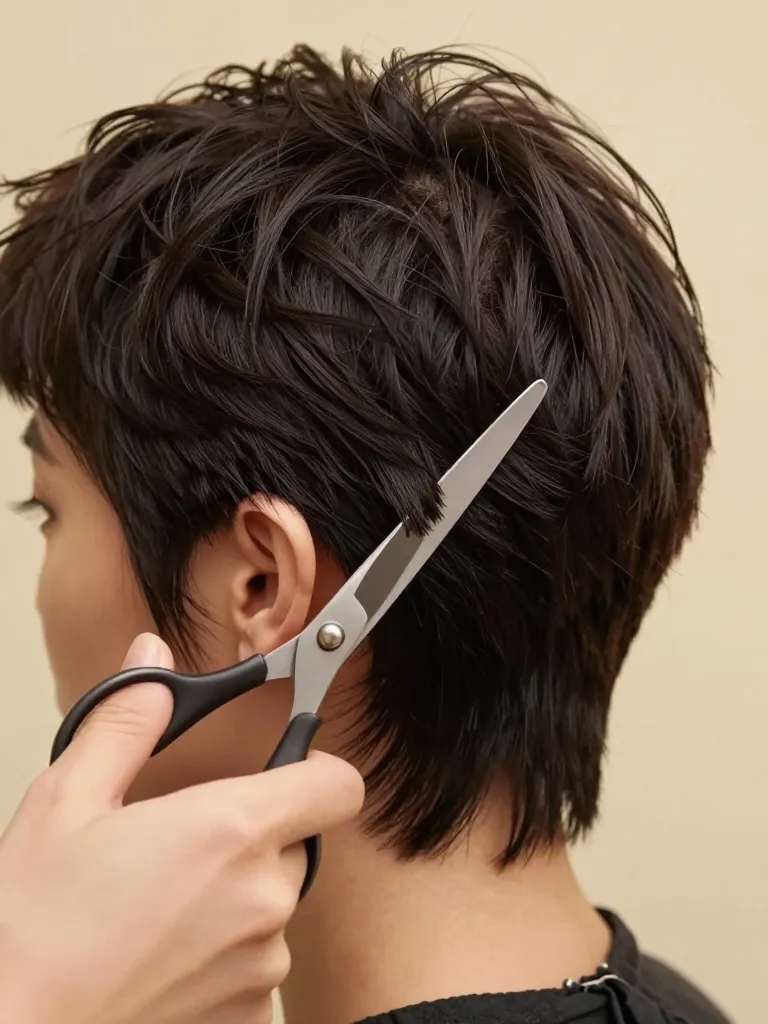
Release the side sections. Take a small section from the front of one side, pull it forward to where you want the shortest face-framing layer to fall — usually chin to jaw length for the 80s shag. Cut straight across. This is your face-framing guide. Now work backward along the side, pulling each section forward to the guide and cutting. The layers gradually get longer as you move toward the back, blending into the back section you already cut. Repeat on the other side, matching the length. For the crown, pull small sections straight up from the head and cut to about 4-6 inches — this is what creates the volume at the top. The shorter the crown layers, the more lift you get. Don’t go shorter than 3 inches unless you want a very defined, structured look.
Critical: The face-framing layers are the most visible part — take your time and cut conservatively
Pro Tip: Point-cut into the ends (cutting at an angle into the tips) for texture instead of a blunt line
Step 5: Add Texture with the Razor Comb
5 minutes
Prerequisites: Step 4 complete
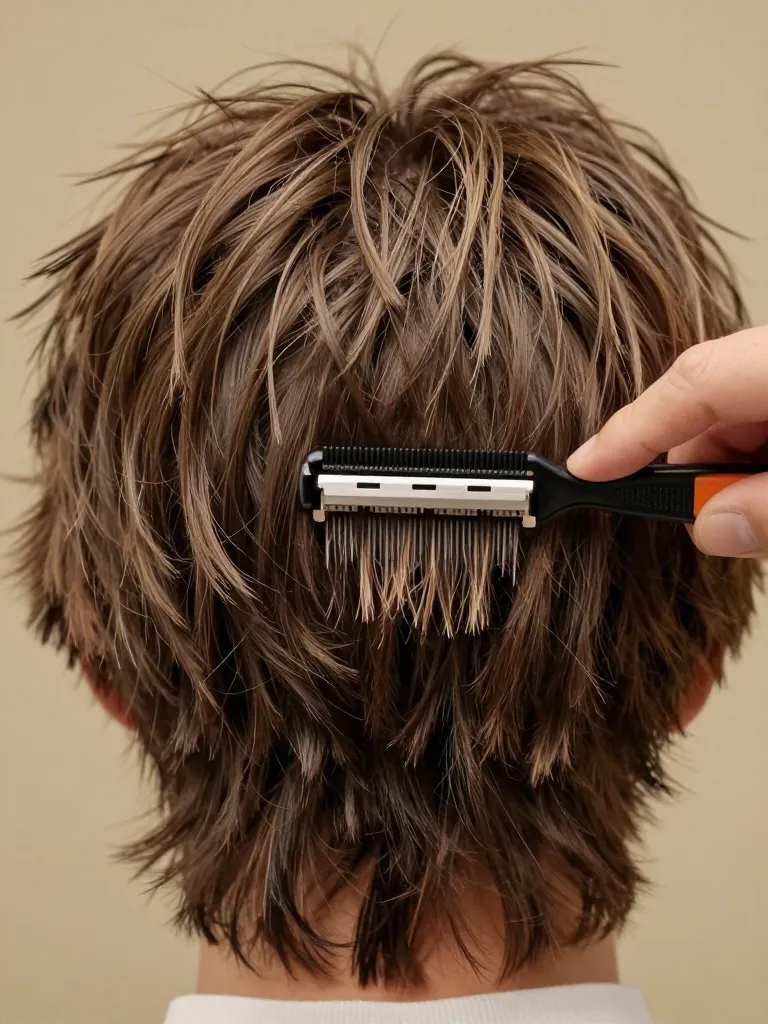
This is where the shag comes alive. Take the razor comb and, starting about two inches from the ends, drag it downward through the hair in short strokes. The razor slices into the hair, creating the feathery, piecey texture that defines the shag. Focus on the mid-lengths and ends — never razor the roots or you’ll create frizz. Work through each section, spending more time on areas that look too blunt or heavy. The goal is for the ends to look wispy and separated, not like a solid line. If you don’t have a razor comb, you can achieve a similar effect by point-cutting aggressively into the ends with your shears — but the razor does it faster and more naturally.
Critical: Use light pressure — heavy razor strokes cut too much hair at once
Pro Tip: Razor less than you think. You can always take more off, but you can’t add it back.
Step 6: Style and Final Check

10 minutes
Prerequisites: Step 5 complete
Shake your head upside down to loosen the layers. Apply a golf-ball-sized amount of volumizing mousse to the roots, scrunching upward. Rough-dry with a blow-dryer on medium heat, using your fingers instead of a brush — this preserves the messy, undone texture. Once dry, spray texturizing spray through the mid-lengths and ends, scrunching and separating pieces with your fingers. Check the back with your handheld mirror. The layers should cascade naturally, with the shortest crown layers creating lift and the longer layers falling in a graduated cascade. If anything looks too heavy or blunt, go back in with the razor comb for a few more passes.
Critical: Never brush a shag after styling — it destroys the texture and makes it look flat
Pro Tip: Day-two shags always look better. Sleep on it and refresh with dry shampoo in the morning.
Safety Warnings
- Never use kitchen scissors or craft scissors on hair — they’re not sharp enough and will crush the cuticle, causing split ends within days.
- If you nick your ear or neck with the razor comb, clean the wound and apply a small bandage before continuing.
- Cut less than you think you need on the first pass. You can always go shorter, but you can’t glue hair back on.
Why This Works
The 80s shag works because of how the layers interact with hair’s natural weight. By cutting the crown layers shorter, you remove weight from the top — which lets the hair lift and create volume naturally. The longer layers at the bottom retain enough weight to hang smoothly, while the graduated lengths in between create the cascading cascade effect. The razor texturizing thins the ends without removing overall length, which is what gives the shag its signature feathery movement. It’s controlled chaos — the layers are deliberate, but the styling is intentionally undone.
Tips
Start with the back. The back sets the foundation. Get that right and the rest of the cut falls into place.
Dry hair only. Wet hair stretches and looks longer. Cut dry so you see exactly what you’re getting.
Less razor is more. It’s tempting to razor everything for texture. Don’t. Over-razored hair looks frizzy, not feathery.
Embrace the mess. The 80s shag is supposed to look a little undone. If it looks too perfect, mess it up.
The 80s shag is forgiving. It’s one of the few haircuts where imperfection is the point — uneven layers, textured ends, a little bedhead energy. Cut it once, and you’ll wonder why you ever paid someone else to do it. The layers grow out naturally, so you get a solid 8-10 weeks before you even need to think about trimming.
Grab the shears. Section the hair. Let the layers do their thing.
