Haircuts for Men with Straight Hair: How to Create Texture Where None Exists
Straight hair doesn’t have a texture problem. It has a flatness problem. Here’s the engineering fix.
Straight hair is the easiest texture to cut and the hardest texture to style. It lays flat, shows every imperfection, and has zero natural volume. Most barbers treat straight hair like wavy hair — same cuts, same techniques, same products. But straight hair needs a fundamentally different approach: you have to engineer the texture that curly-haired guys get for free. The good news: straight hair holds clean lines better than any other texture, which means your geometric cuts will look sharper, your gradients will be crisper, and your fades will be more defined. This guide covers the textured crop — the most versatile straight-hair men’s haircut — and the engineering techniques that make it work.
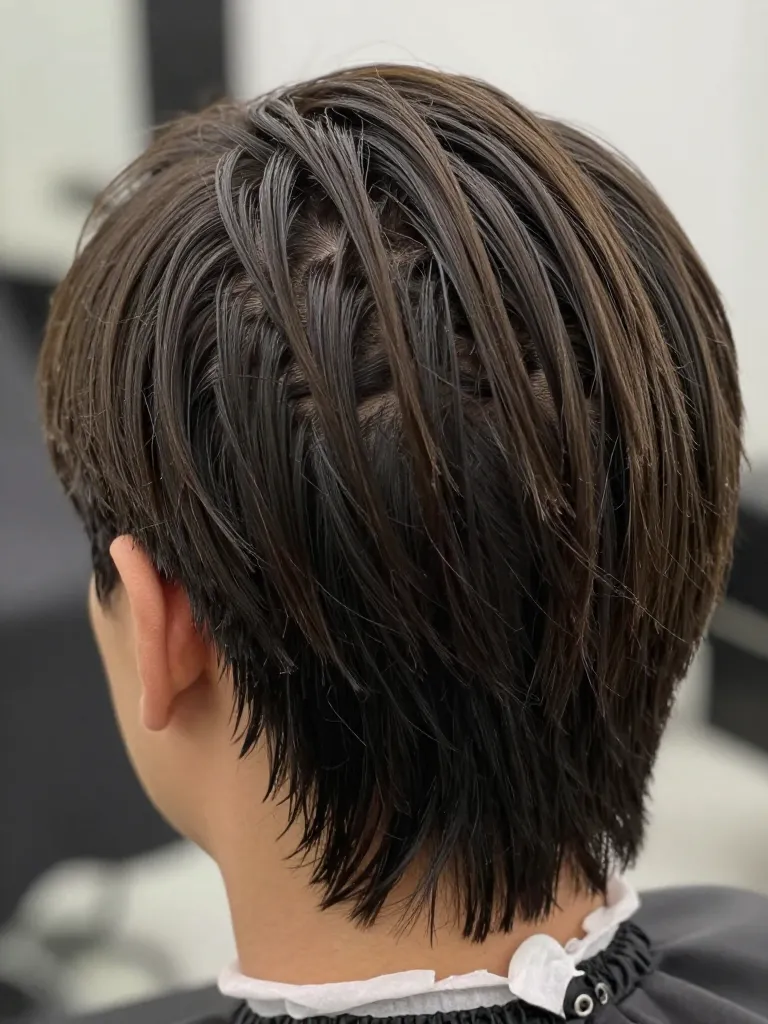
Step 1: Build the Foundation with Internal Layering
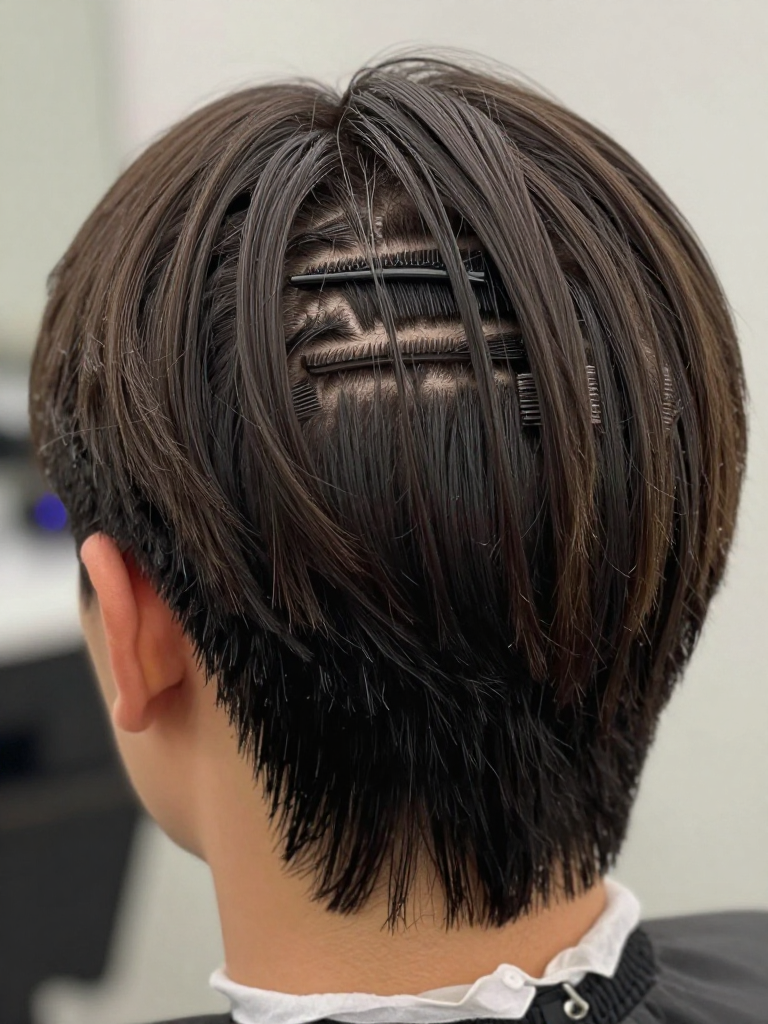
⏱ 10-15 minutes
Prerequisites: Sharp shears, Sectioning clips, Comb
Straight hair needs internal layering more than any other texture — without it, the hair hangs like a flat sheet. The principle is simple: the outer layer stays at your target length, while the interior layers are cut progressively shorter. This creates internal weight removal — the outer layer looks full and shaped, but the inside has space for movement. Take horizontal sections through the interior and cut each one 0.5-1 inch shorter than the layer above. The outer layer remains untouched. When you run your fingers through the hair, you should feel individual sections, not a solid mass. Internal layering is the foundation of every good straight-hair haircut. Without it, you’re fighting gravity. With it, you’re working with physics.
Step 2: Create the Textured Top with Steep-Angle Point-Cutting
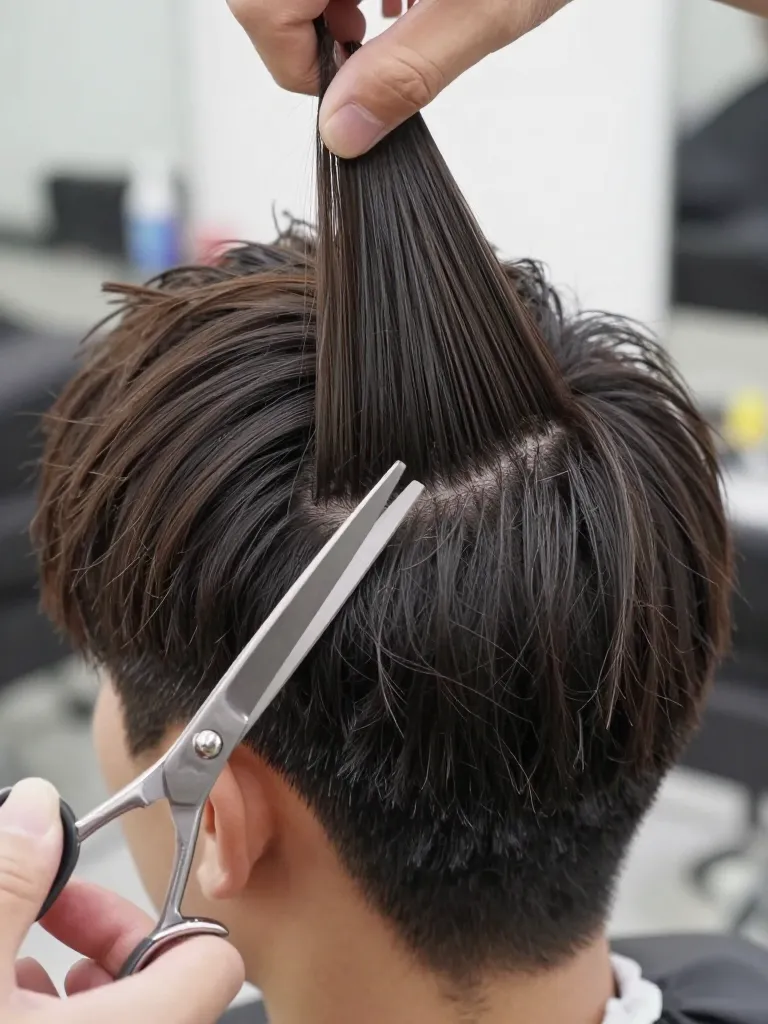
⏱ 10-15 minutes
Prerequisites: Sharp shears, Comb, Mirror
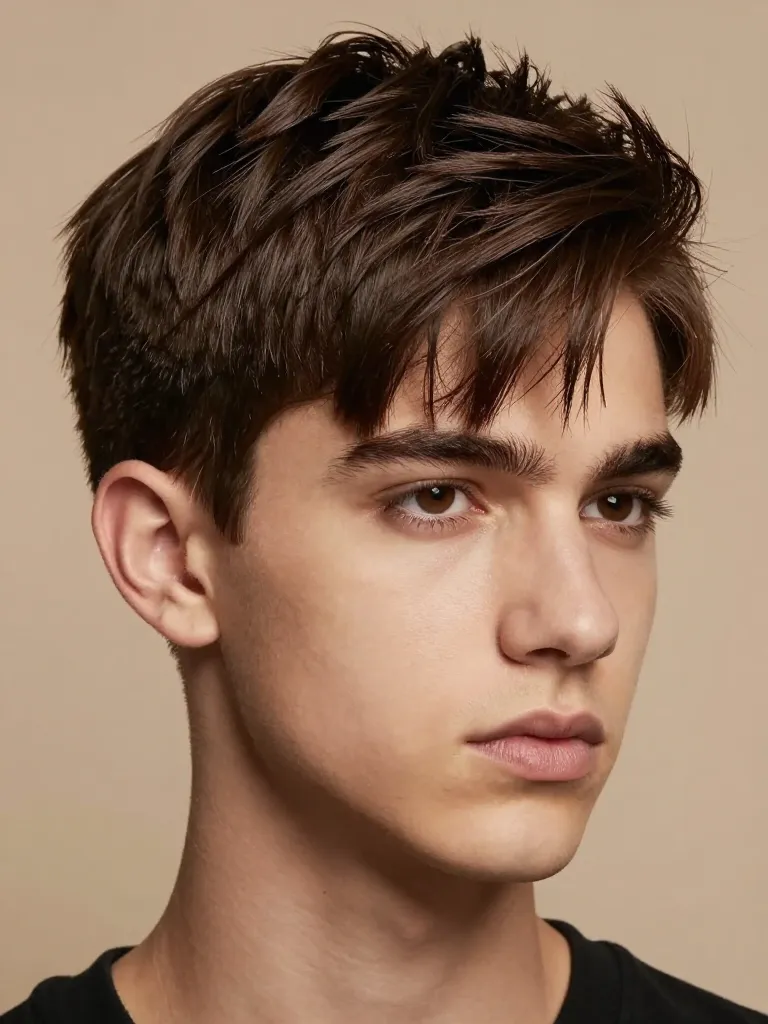
The top of a straight-hair textured crop needs aggressive texturing. Take vertical sections through the top and point-cut into the ends at steep angles — 60 to 70 degrees. This is steeper than you’d use on wavy or curly hair, because straight hair needs more help creating texture. The steep angle removes more weight and creates more separation between strands. The crown should be 2-3 inches (enough for volume when styled). The fringe should be 2-3 inches, cut at an angle so it’s shorter in the center and longer at the temples. After cutting, tousle the top with your fingers — if it falls into piece-y chunks with visible separation, the texture is right. If it clumps together, you need more point-cutting.
Step 3: Texturize the Mid-Lengths with a Razor Comb
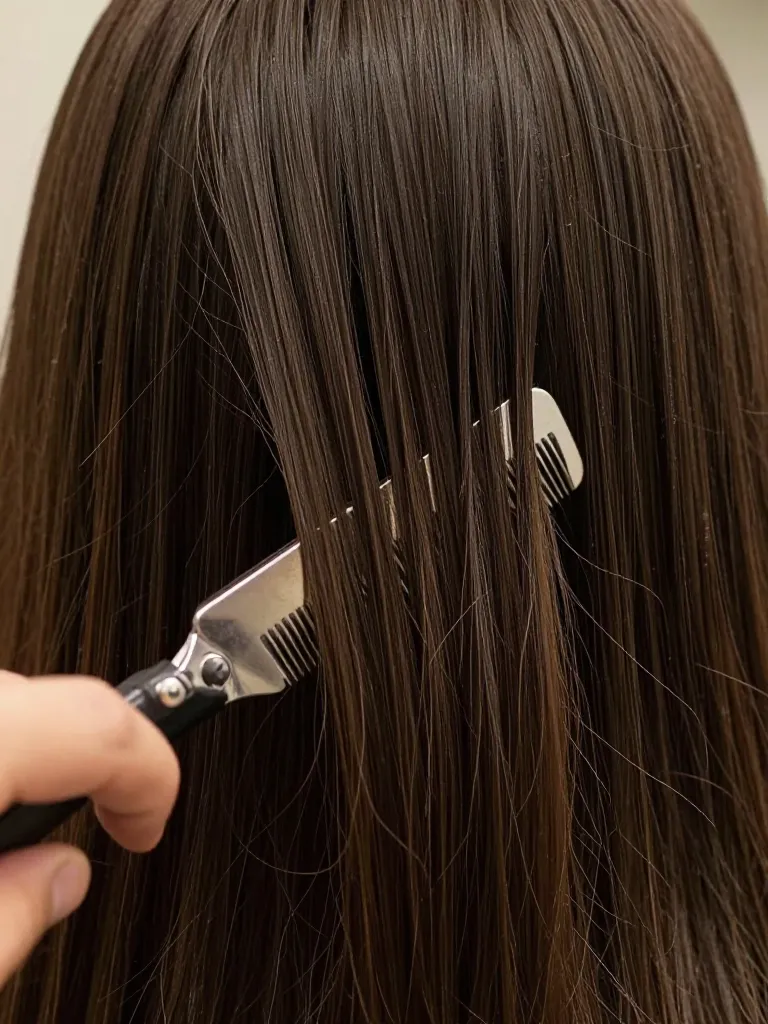
⏱ 5-10 minutes
Prerequisites: Razor comb, Regular shears for refinement
Straight hair needs surface-level texturing — the internal layering handles weight removal, but the surface needs movement creation. Using a razor comb, work through the mid-lengths in short, choppy strokes. Focus on the areas where the hair tends to lay flattest: the sides, the crown, and the back. The razor creates micro-texture — tiny variations in strand length that prevent the hair from lying flat against itself. Work in one direction only (downward) — back-and-forth razor strokes on straight hair cause frizz and split ends. The goal is visible strand separation: when you run your fingers through the hair, you should feel individual sections, not a solid mass.
Step 4: Style with Matte Product for Texture and Hold
⏱ 5-10 minutes daily
Prerequisites: Matte clay or paste, Blow dryer, Flexible-hold hairspray
Straight-hair textured crops need product to live. Without it, gravity wins and the hair flattens by lunchtime. Start with damp hair. Apply a matte clay or texturizing paste — work it through the mid-lengths and ends, scrunching to activate the texture. For the top, blow-dry while directing the hair forward and slightly up — this builds volume at the crown and creates the textured crop shape. Finish with a light mist of flexible-hold hairspray. The final look should have matte texture (not shine — shine on straight hair reads as greasy), visible piece-y separation, and enough volume on top to create the silhouette. The product layer is the final engineering: it adds grip, separation, and hold that straight hair doesn’t have naturally.
- Always use sharp hair-cutting shears — dull blades crush straight hair cuticles and cause visible split ends
- Razor in one direction only on straight hair — back-and-forth strokes cause frizz
- Cut less than you think — straight hair shows length more than curly hair at the same measurement
Why This Works
Straight hair and textured crops work together because straight hair excels at the one thing textured crops need most: clean lines. The geometric shape of a textured crop — the graduated sides, the defined fringe, the structured silhouette — reads as sharper and more precise on straight hair than any other texture. The challenge — flatness — is solved through internal layering (structural weight removal), steep-angle texturing (surface-level movement creation), and product application (external grip and hold). The result is a haircut that’s architecturally precise, visually striking, and — critically — distinguishable from ‘guy who forgot to get a haircut.’
Pro Tips
Matte over shine: Shine on straight hair reads as greasy, not styled — always use matte products
Internal layering is non-negotiable: Without it, the hair hangs flat like a curtain — this is the #1 mistake
Carry touch-up product: Straight hair loses texture faster than curly — a small clay tin saves the look by 3pm
The first wash matters: Product buildup weighs straight hair down — wash every 2-3 days with a lightweight shampoo
Sleep on satin: Cotton pillowcases create friction that flattens straight hair texture overnight — satin preserves it
Point-cut everything: Blunt cuts on straight hair create visible horizontal lines — point-cut every section
Straight hair isn’t a disadvantage — it’s a different engineering problem. The texture you want doesn’t exist naturally, so you have to build it. Internal layering creates the structural foundation. Steep-angle texturing creates the surface movement. Product creates the grip and hold. The result is a textured crop that looks effortlessly textured — which is the hardest kind of effort. But when it works, it works. The clean lines, the sharp gradient, the piece-y texture — straight hair gives you a precision that other textures can’t match.
Straight hair, engineered texture. That’s the formula. ✂️
