Haircut Designs for Men: How to Add Geometric Lines and Patterns
Your haircut is a canvas. Here’s how to draw on it.
Haircut designs — the lines, patterns, and geometric shapes shaved into the sides and back of a fade — are the most polarizing element in men’s grooming. Done wrong, they look like a middle schooler got hold of a razor. Done right, they’re wearable art that elevates a standard fade into something architectural. The difference between good and bad haircut designs is precision: clean lines, intentional placement, and patterns that complement the haircut’s natural geometry. This guide covers the technique, the tools, and the patterns — from a single clean line to complex geometric work.
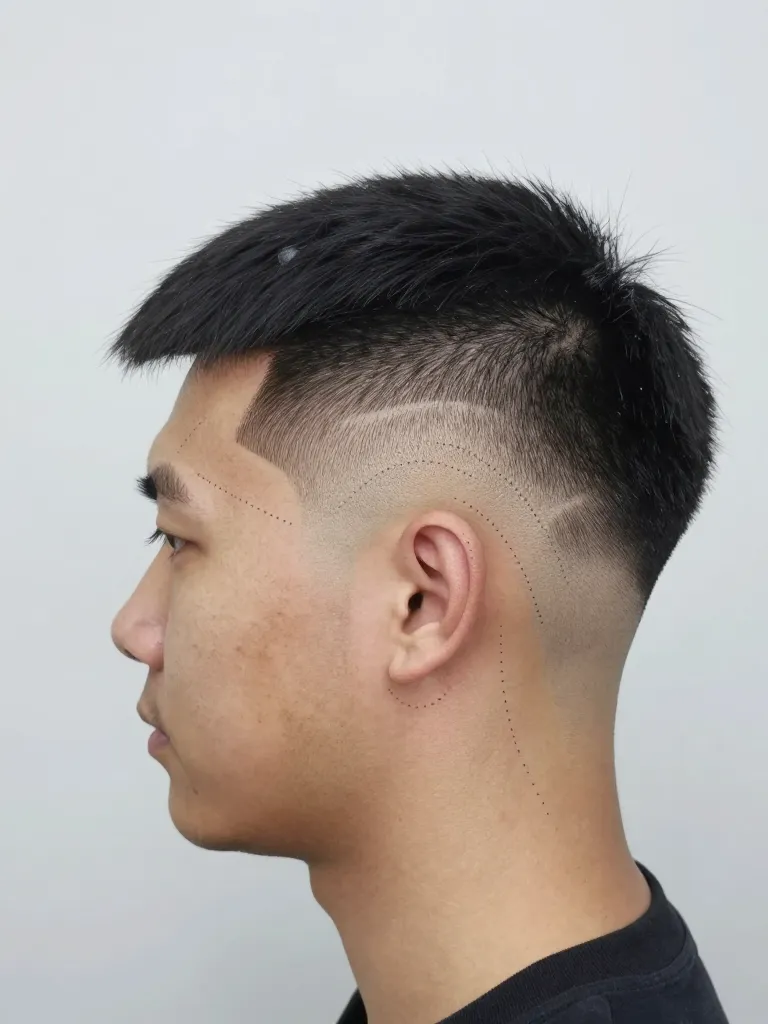
Step 1: Choose Your Design Placement Based on Your Head Geometry
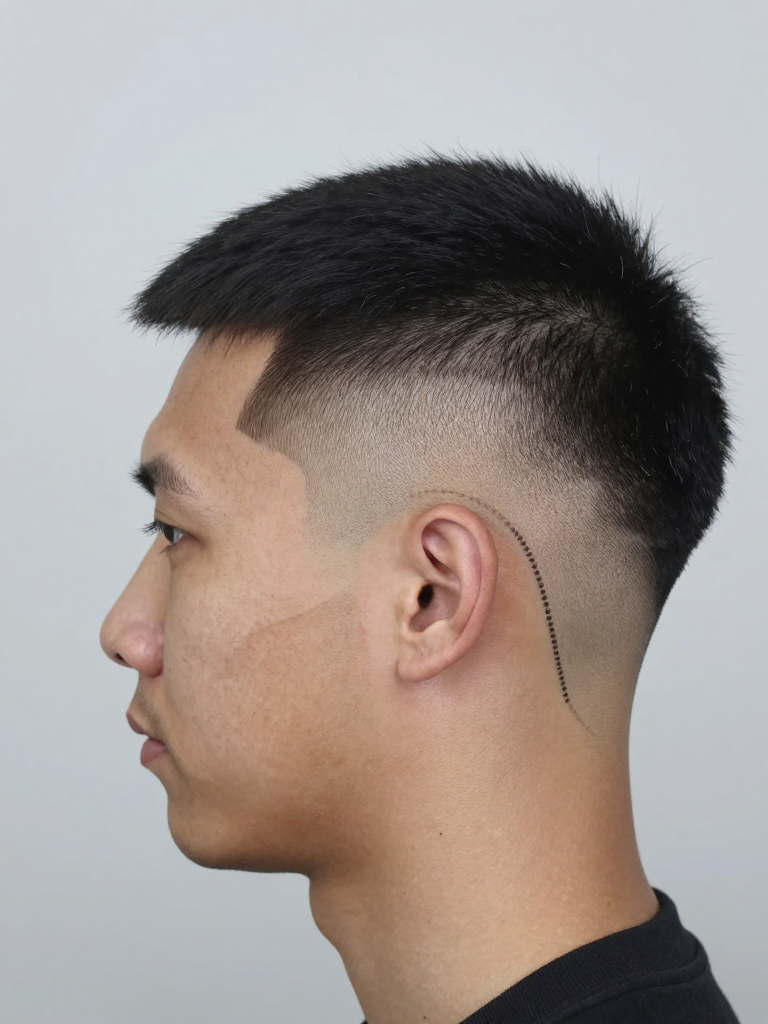
⏱ 5 minutes for planning, 10-15 minutes for execution
Prerequisites: Handheld mirror, Fine-tip clipper or trimmer, Straight razor for cleanup
Before you touch a razor, you need to understand your head’s geometry. Haircut designs work best when they follow the natural lines of the skull — not fight them. The three best placement zones are: (1) above the ear, following the parietal ridge — this is the most versatile and workplace-acceptable placement. (2) Near the temple, running from the hairline back — this creates a dramatic framing effect. (3) Along the back, following the occipital bone — this is visible only from behind, making it a ‘secret’ design. Start with zone 1 — above the ear. This zone follows a natural ridge in the skull, which means your design will look like it belongs there rather than being slapped on randomly.
Step 2: Start with a Single Clean Line
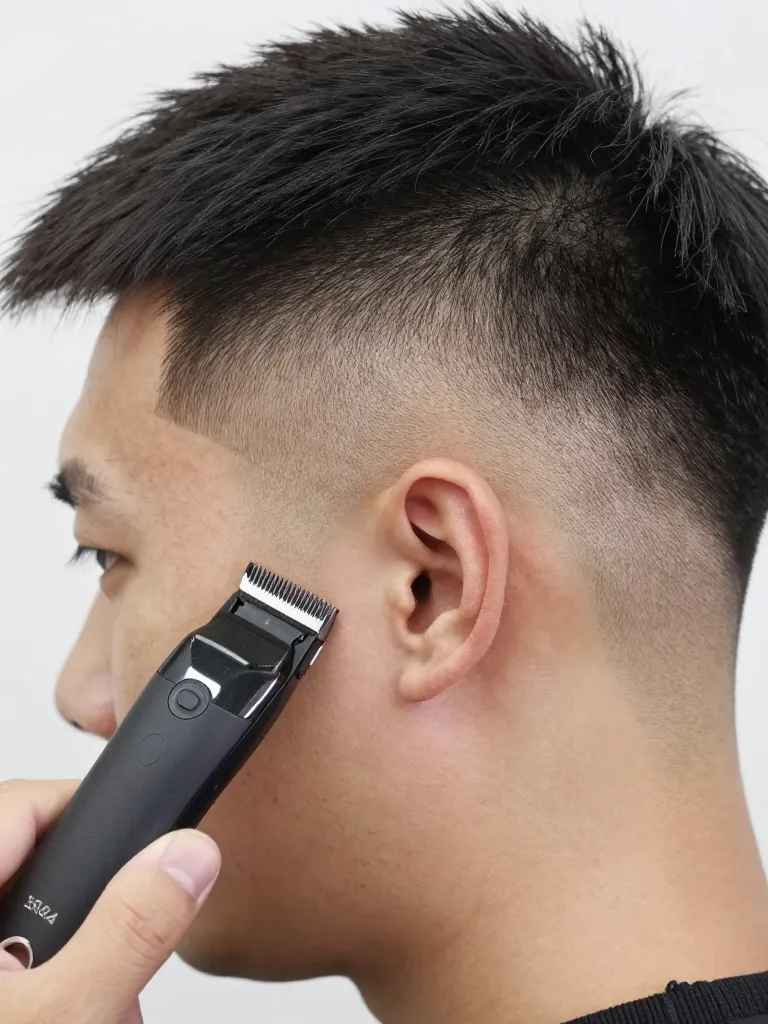
⏱ 10-15 minutes
Prerequisites: Fine-tip trimmer, Straight razor, Handheld mirror
The single line is the foundation of all haircut designs — and the hardest to execute well. Using a fine-tip trimmer (not clippers — the blade is too wide for precision work), hold the trimmer at a 90-degree angle to the head and draw a single horizontal line above the ear, following the parietal ridge. Move slowly and steadily — speed is the enemy of clean lines. The line should be 1-2mm wide and extend from the temple to just behind the ear. If you wobble, stop. Don’t try to correct it mid-line — a wobble with a correction looks worse than a wobble alone. Instead, go back and clean up the line with a straight razor, making it slightly wider to hide the wobble. The single line is deceptively simple. It requires the same precision as complex patterns, but there’s nowhere to hide imperfections.
Step 3: Build Parallel Lines for Geometric Patterns
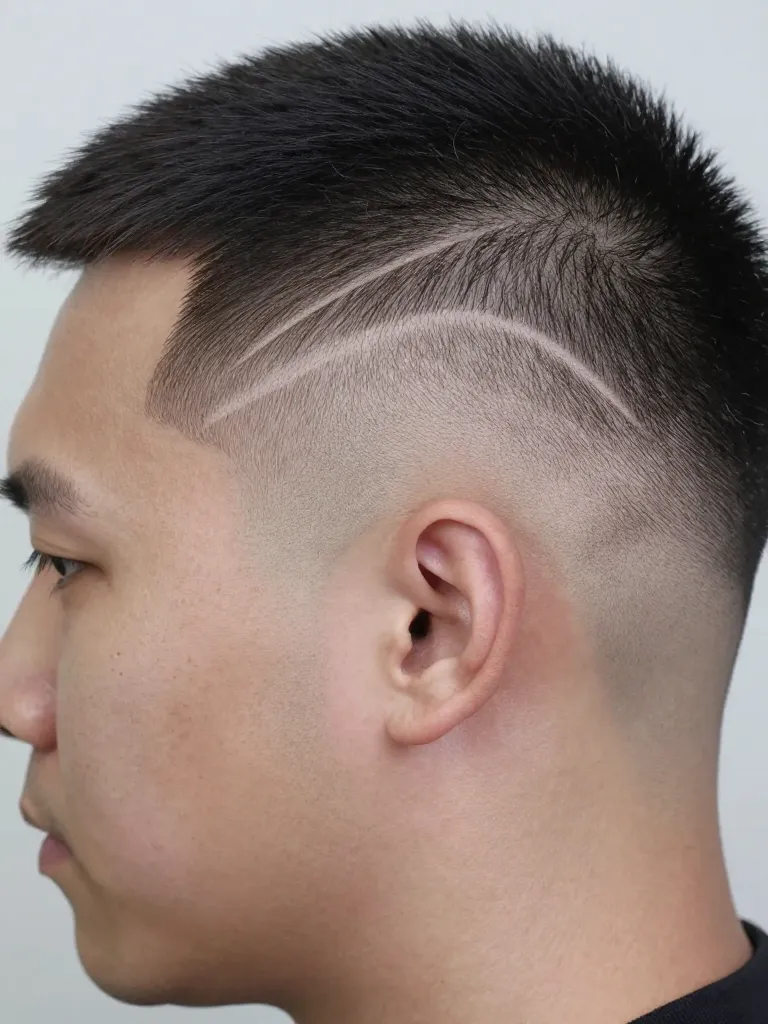
⏱ 15-20 minutes
Prerequisites: Fine-tip trimmer, Comb or ruler for spacing, Straight razor
Once you’ve mastered the single line, build to parallel lines. Using the first line as your anchor, add 2-3 more lines above it, each spaced 3-5mm apart. The spacing must be consistent — measure with the corner of your comb or a ruler if needed. The lines should follow the same path as the first (parallel to the parietal ridge). Parallel lines are the most common haircut design because they’re versatile, modern, and work with virtually any fade length. They also hide imperfections better than a single line — if one line wobbles slightly, the parallel lines around it create a pattern that distracts the eye. The key is spacing consistency. If one gap is 3mm and the next is 5mm, the whole pattern looks off.
Step 4: Add Angles and Geometric Shapes
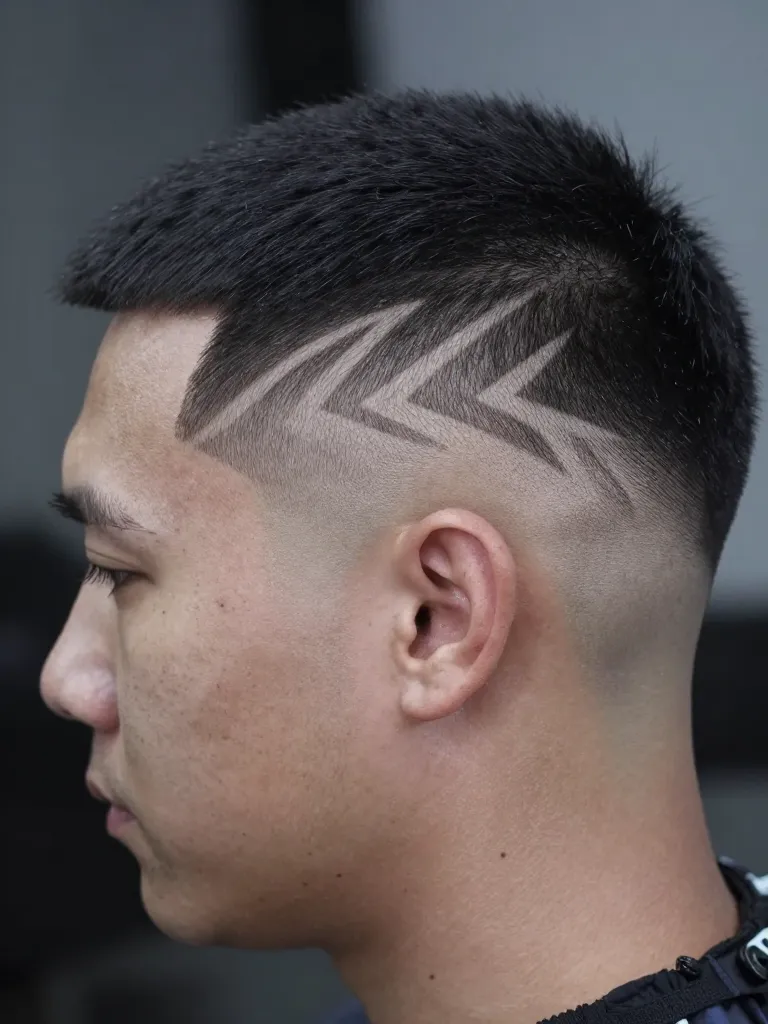
⏱ 20-30 minutes
Prerequisites: Fine-tip trimmer, Straight razor, White eyeliner pencil for planning
After mastering parallel lines, introduce angles. The simplest angular design is the chevron — two lines meeting at a point, creating a V-shape. Draw the first line at a 45-degree angle from the parietal ridge, then mirror it to create the V. The point should sit directly above the ear. More complex patterns build on this: connected chevrons create a zigzag, stacked triangles create a geometric grid, and curved lines create organic patterns. The key to angular designs is the connection points — where two lines meet. These points must be sharp and precise. Use the tip of your trimmer, not the flat blade, for connection points. If the connection is rounded, the whole design looks soft and unfinished.
Step 5: Clean Up and Define the Design Edges
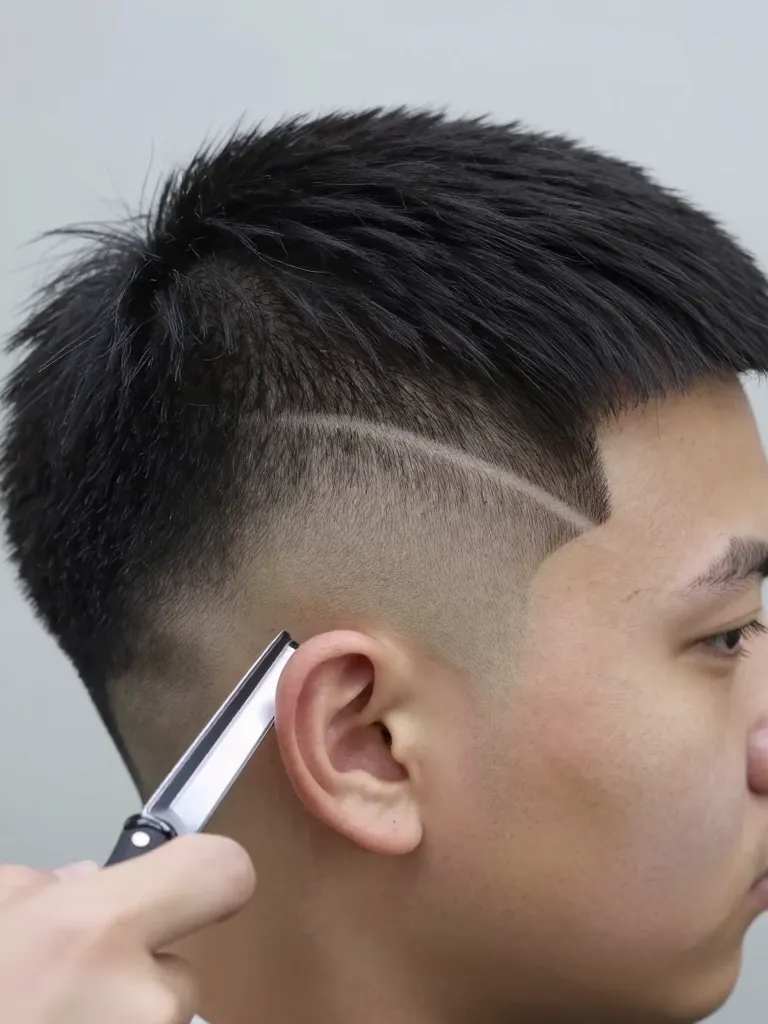
⏱ 10-15 minutes
Prerequisites: Straight razor, Shaving cream or oil, Moisturizer or aftershave
The final step is cleanup and definition. Using a straight razor, carefully shave along the edges of each line in your design. This widens the lines slightly (from 1mm to 2-3mm) and creates razor-sharp edges that contrast with the surrounding fade. The cleanup is what separates a professional-looking design from an amateur one. Without it, the lines look fuzzy and undefined. With it, they look intentional and architectural. After cleanup, apply a light moisturizer or aftershave to soothe the shaved areas. The design will look its sharpest immediately after cleanup — within 2-3 days, regrowth will soften the edges, so plan your maintenance accordingly.
- Always use a fresh razor blade for design cleanup — dull blades cause irritation and uneven lines
- Don’t press hard with the trimmer — light pressure creates cleaner lines and prevents skin irritation
- If you nick the skin, apply a styptic pencil or alum block immediately to stop bleeding
Why This Works
Haircut designs work because they add a geometric dimension to a haircut that’s otherwise just length and texture. The human eye is drawn to patterns — parallel lines, angles, and geometric shapes create visual interest that makes a standard fade look intentional and architectural. The technique works because it’s additive, not subtractive: you’re not removing length, you’re adding structure. The designs sit within the fade, using the contrast between shaved skin and surrounding hair to create the pattern. This means they work with any fade type (skin fade, mid fade, low fade) and any hair texture. The key is precision — clean lines, consistent spacing, and sharp connection points. Sloppy lines look like mistakes. Clean lines look like art.
Pro Tips
Start simple: A single clean line is harder to execute than a complex pattern — master the basics before advancing
Use eyeliner pencil first: Draw your design on the fade before cutting — it’s easier to erase pencil than fix razor mistakes
Stretch the skin taut: Loose skin creates wobbly lines — always stretch with your free hand
Maintenance every 5-7 days: Designs blur as hair grows — re-clean the lines every week to keep them sharp
Match the design to the fade: Simple fades get simple designs; complex fades can handle complex patterns
Clean your trimmer between lines: Hair buildup on the blade creates uneven lines — brush after every pass
Haircut designs are the punctuation mark on a fade. They take a haircut that’s already good and make it deliberate, intentional, and architectural. The technique isn’t complicated — it’s just precise. Clean lines, consistent spacing, sharp connection points. Start with a single line, master the basics, and build from there. Your fade is the canvas. The design is the signature.
One line at a time. That’s how you build art. ✂️
